Monday, September 27, 2021

Refashion It with Style

Officially, fall is here, but I have no intention of tackling the seasonal clothes change and wardrobe reorganization just yet! I always try to do that on weekends, because I like to thoroughly go through the clothes and see what things we'll continue using, which ones' lives can be prolonged by a quick (and most often) whimsical refashion, and which ones are to be taken to the Red Cross. 
Hence, weeks before that I like to scour for ideas on the Internet, and these are my latest finds. So I'll just let these ideas slowly simmer in my head. 
I liked the above sweater refashion (via) because you can alter any shortened or crop sweater and make it longer, although I would not go with crochet motifs - rather use a more denser crochet panel. But that's me. 
 
I also chose this one because adding the netted crochet is a brilliant touch and those ribbon embroidered flowers can be used if there are holes on the cardi as well as stains. Or maybe add them just for effect. The sewn collar makes the whole look complete.  

Having a soft spot for coats / jackets refashion, I picked this one and love how the owner has refashioned it with lace, embroidery and ribbons. A lovely little masterpiece. Via.
 

And there are these amazing bell bottom jeans. If you have a worn out pair - glam them up with crochet. There is a free tutorial on youtube here.

Do you refashion your clothes? What pieces mostly?

Friday, September 24, 2021

Blooming Tube Necklaces

And, here they are! The blooming / flowering tube necklaces!
Making the tubes flower is extremely simple and what a game-changer! 
Now, I am even more tempted to try out the innumerous possibilities they offer.
I played with the two types of flowers as well as with the wooden and crocheted beads to create these lovely (nursing) necklaces.
 
The simple crochet tube pattern was upgraded with the pattern for these flowers, without change of the price. Find the pattern on etsy and ravelry.

Wednesday, September 22, 2021

The Cora Top - pattern release


Happy first day of fall! 
However, it seems I am still not done with summer because I wanted to show you another of my lace blouses. This is Cora. Made in a wonderful coral cotton yarn, using a repetitive and mesmerizing shell pattern.
 
More about the technical side of the pattern in my shops on: etsy, ravelry and payhip.

Monday, September 20, 2021

Playing with Tube Necklaces


Happy Monday crafty friends! 
As you can see from the pictures, I had yet another interesting play with my crochet tube necklaces. When I made the Freya necklace, I got that itch to bring these to a new level and make them more appealing. And it happened with a new batch of blooming tube necklaces.
 
I decided to freshen up my existing tube necklace pattern by adding the blooming instructions, which I believe is the touch that was truly needed.
As I am still editing some parts, the full reveal will be tomorrow.


Thursday, September 16, 2021

Crochet Swatches Tagging
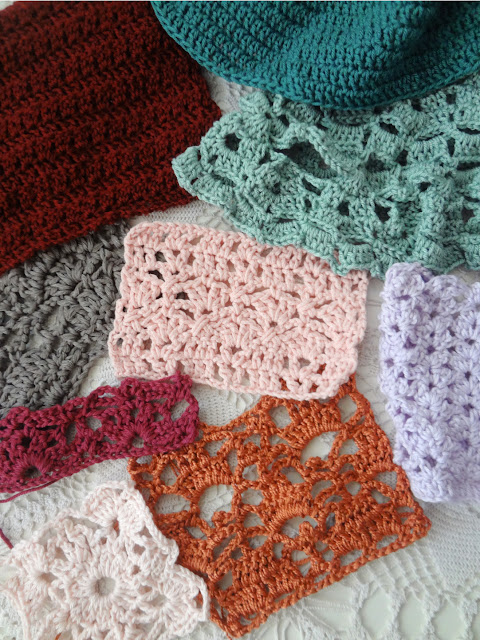
  
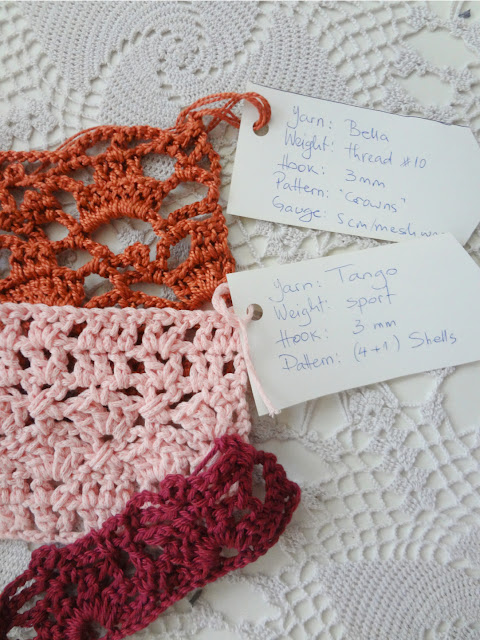
Making pattern swatches is what I love doing when I am in-between projects. It gives me peace of mind to see the yarn I want for a project works good with a certain pattern. 
 
After I make the swatch I always add a tag of the following things:
* Brand of yarn
* Weight  of yarn
* Hook size
* Gauge  (I sometimes leave this out if I want to try it with different yarn and relevant hook)
* Name of pattern / pattern repeats

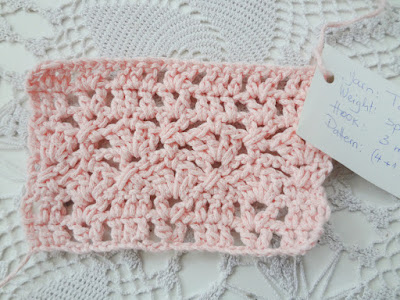
Tagging swatches is extremely helpful when determining whether a pattern is suitable / good for a crochet garment for example. If I am not satisfied how a swatch looks like with a particular pattern, I try bigger (or smaller) weight of yarn. For me, the most important information on the tag is the pattern repeats, and that info has saved my nerves from wrecking on multiple occasions. 

Do you make swatches? What method do you use to note down / record swatches' essential information?


Monday, September 13, 2021

What I Have Pinned Lately #23

Via

Happy Monday, crafty friends! Starting the week with some inspiration. 

Enjoy the selection (click on the VIA wording under the picture to be taken to the respective designer / creator).  

Via

                                                                             Via


Saturday, September 11, 2021

Keira Filet Crochet Top -pattern release

 
The Keira Top is made in the filet crochet technique. 
used 200 gr of Alize Diva (silky effect- Beige/167) which is lace yarn, so to acquire thickness and make it a DK size, I doubled the yarn to make this top. If you don’t want to work with doubled yarn, I recommend using Alize Diva Plus or any DK yarn and a 4mm hook (US G-6 / UK 8).

Content of yarn: 100% Microfiber Acrylic. Skeins come in 100 gr– 3.52Oz, in 350 mt-383 yds. You will need about 200 grams for this top. When finished, the top has a nice stretch.

Gauge: 8 cm / 3.14” of double crochet work measured in center of first row

Used terms in American terminology: chain (ch), chain space (ch-sp), slip stitch (sl st.), skip (sk), double crochet (dc), 3-ch picot, 4-dc bobble stitch

Other: tapestry needle for weaving in ends.

Length of finished top/ tube without ties for the model in the pictures: 38 cm (14.96”) across 22 cm (8.66”) down. Ties: each is 34 cm (13.38”) long and 3.5 (1.37”) wide.
Fit size: The top is worked as a tube, so work / repeat the given pattern until you can wrap and close the tube around your bust. Further instructions below. Model’s size in the photos: S 
 
The pattern is in my etsy, ravelry and payhip shops.  

Thursday, September 9, 2021

End of Summer Sale

 
Hello crocheters!
I am having an end of summer sale in my shop. Get 25% off  of patterns as well as physical items but NOT pattern bundles. Use code ENDOFSUMMER or simply click here - the discount will be automatically calculated. The offer is valid to the end of September. 
Do drop by to see if you find anything interesting. 

Tuesday, September 7, 2021

The Calypso Bag - pattern release


Let me present to you my Calypso bag. In this one I combined my love for bobbles and crosses to get this unique texture. 

The written pattern is accompanied with numerous pictures for easier comprehension. The bag is not lined so, it does not come with lining instructions.


Yarn and hook: DK yarn of your choice (150 gr) and a 4.00 mm hook. Tapestry needle for sewing the bag and weaving ends.

Used terms (American terminology): chain (ch), chain space (ch-sp), slip stitch (sl st), skip (sk), double crochet (dc), crossed double crochet (X), bobble stitch.

Instructions for the bobble stitch: https://www.yarnspirations.com/row-en/how-to-crochet-bobbles.html

Finished measurements: : 31 x 31 cm (12.20” x 12.20”) of bag’s circle body with the band.  

The patterns is in my shops: etsy, ravelry, payhip


Saturday, September 4, 2021

Crochet Ear-Pods Holder - free pattern


Eva wanted me to make her a holder for her earpods, and since yours truly is always up for a new challenge - this is the result!

Below you can find the pattern how to make one. 
Please note that: The written  pattern in its entirety and the step-by step photos are for personal use only. All property rights belong to Maya Kuzman of The Little Treasures. You can sell finished items from this pattern. 

What you need:
1) DK yarn in 2 colors (Phil Cotton 4) and a 3mm hook
2) sewing needle and matching thread 
3) small button or bead for closure

Crochet terms in American terminology: chain (ch), stitches (st.), slip stitch (sl st), single crochet (sc), half double crochet (hdc), half-double crochet cluster, double crochet (dc), 3-ch picot.

Measures: 8x8cm.
 
 
Foundation and round 1: In color A, ch6 and join with 1st st. to make a ring. In ring, ch4 (counts as one dc+ 1 chain), dc1, ch1. Repeat this pattern 6 more times. There should be 8 dc sts in this round. Sl st with 1st st. to end round.
Round 2: Ch2 (counts as the 1st hdc) and make a 2hdc-cluster. Ch3 and make a 3hdc-cluster in the ch-space between the dc-stitches of the row below. Repeat this pattern around. You end the round with a ch3 and a sl st into 1st st to close round.  
Round 3: Insert color B, and repeat round 2.
 
Round 4: Insert color A, and ch3 (counts as the 1st dc), then dc3 in first ch-space and dc1 in the cluster-stitch. Repeat this pattern around. Sl st with 1st st. to end round. (32) 
Round 5: Insert color B, ch3 (counts as the 1st dc) and dc1 in all stitches around. Sl st with 1st st. to end round. (32)
Round 6: in same color, ch3 and make a picot, sk1 and sc1 in next st. Repeat this picot pattern around. Sl st with 1st st to end round. Front part is done. 
 
Back part pattern: 
Foundation and half-round 1:
In color A, ch4 and join to make a ring. Next, ch2 (counts as 1hdc) and hdc7 in ring (8). Ch2 and turn work. 
Half-round 2: hdc1 in 1st st, and next hdc2 in every stitch (16) Ch2 and turn work.
Half-round 3: hdc1 in all sts. (16). ch1 and turn work.
Half -round 4: sc1 in all sts. (16) When you come to the bottom part (where the initial foundation is), sc1 across so as to even that foundation part. I sc1 in all sts. except the foundation ring where I sc2. It amounted to 8 sc sts in total for that bottom part.  This is the bigger closure piece (we are making something similar to a kangaroo pouch). Work tails.
 
To make the smaller piece, repeat the above pattern but do not work  half-round 4. Work the tails. Thread a needle and sew the smaller piece first. Turn the holder with the back up. Start by positioning the smaller piece immediately below the picot round and sew it on in such a way that the thread will not show on the face side. Once done, position the bigger piece on the other side (it has to be opposite the smaller one) and sew it on. The bigger piece will overlap the smaller one. 
Now you can see that our back is bare. I wanted to sew a small pearl bead on the smaller piece and use that foundation ring as the loop for the bead, but Eva was not up for the idea so we left it as is. I think that a cute tiny button would be just lovely to add. 

Holder flower pattern. We put a small flower at the top and to make it, ch5 and sl st in 1st st (it resembles a picot), ch5 and sl st again in the 1st st (of the second ch-5). Repeat this to make 5 petals and when done just sl st with the very 1st st of the row to close it. Work tails and your flower is done. Sew it on top of the holder.

As Eva's pods were not available for the pictures we used Jacob's earphones and we had to roll the cords nicely so as to fit inside. They fitted, but I feel that a bigger holder is needed for them. So, if you want to make this for such earphones, then I suggest you use heaver yarn and a bigger hook in order to make a big enough holder. 

Looking at it, I am sure it could be also used as a key-chain or a bag decoration. 

Thursday, September 2, 2021

Crochet Spin Necklaces - pattern release

Inspired by my wind spinner I posted about last week, I pursued the idea further and made these necklaces. And the process of creating them was fun! I only wish I had more time to explore more color combinations....
I also tried the pattern with ecru as well and  was happy to see the effort of working with a tiny hook was worth every stitch. 
 
The pattern is in my shops:  etsy, ravelry.