Thursday, December 30, 2021

The Best of TLT in 2021


What will definitely be the highlight this year is that I quit my teaching job of 24 years and I am immeasurably happy I can include it into the best things that happened for me, my family and my blog / small business.  
 
I always mark the end of the year on the blog with a small selection of posts that have sparked a great interest, but this year I am going to keep records short and sweet. 
The most viewed, liked and shared where the wind spinners, the crochet covered buttons and the ideas how to use leftover yarn
 
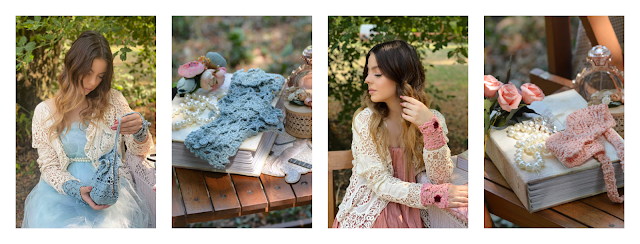
This year I published just one collection - The Nymph Collection.
 
 
I experienced crochet prolificness with 24 paid and 16 free patterns published and a basket full of techniques, ideas, tips and tricks. I'll wrap this up as another creatively fulfilled year. 

With this, I wish you a blessed and safer New Year ahead! 

Past best ofs on the blog:

Monday, December 27, 2021

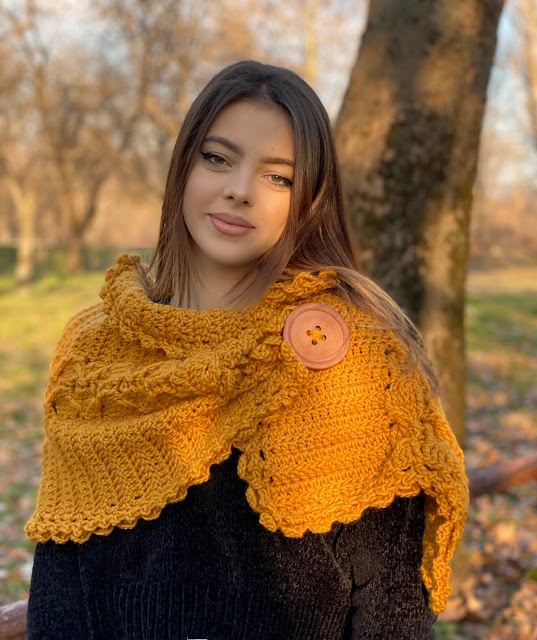
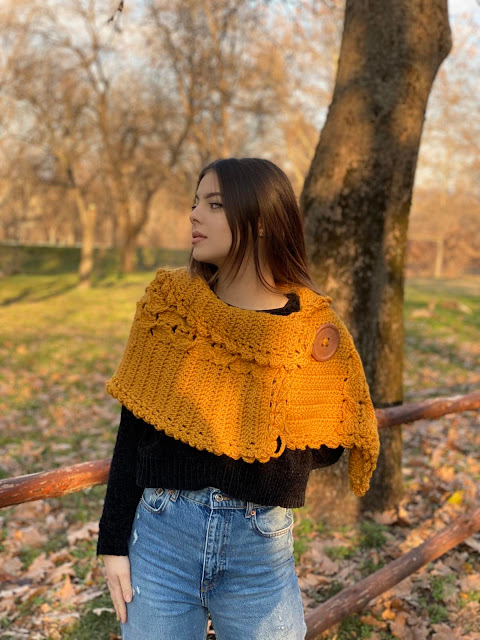
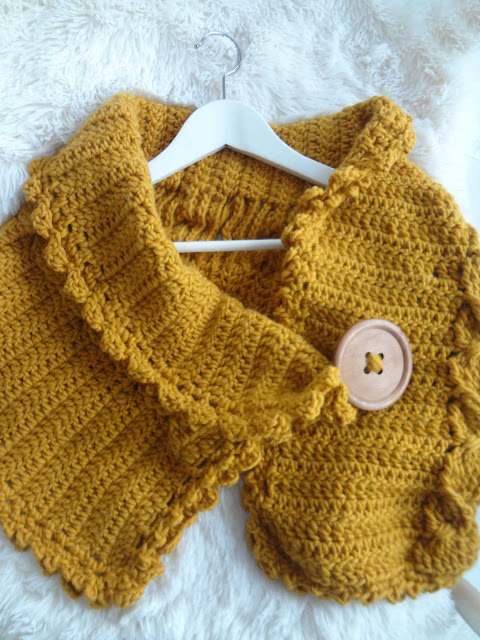
Crochet Cable Cape


Last year, when I was immersed in cable crochet and it was the only thing I could busy my hands with, I also made this cape. 
It features a cable design, rich edging and an enormous button. Although in a shape of a plain rectangle, it offers a lot of possibilities for fun styling. There are two loops on the top and bottom of one side and it can be buttoned  up with one of them for a nice, polished look, or both at the same time for a flouncy look.
The width of the cape allows it to be folded at the upper part so the cape gains another interesting, layered look.
Styling it around the neck with the button in the center will turn this into a rich neck-warmer. 
It's in my shop


Wednesday, December 22, 2021

The Magic of Christmas

Image via  


Christmas has never been about the things you get, but the memories you create together with your loved ones.
 
I wish you a warm, joyful and memorable Christmas! 

Monday, December 20, 2021

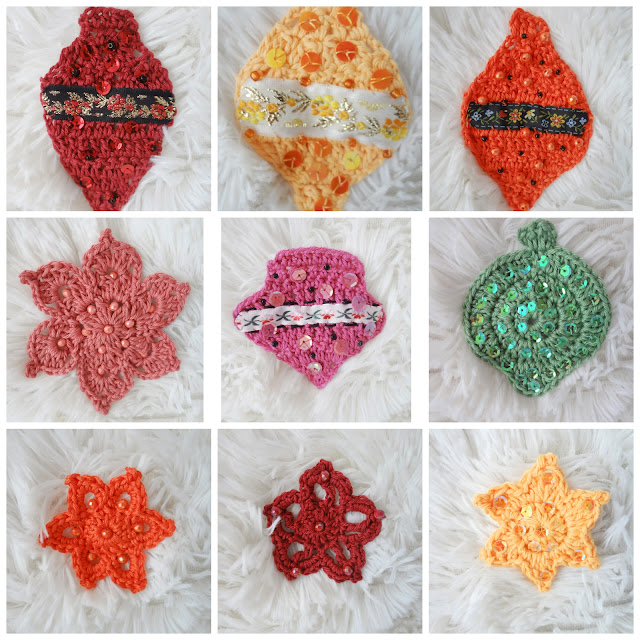
Christmas Applique Ornaments

 
Last year I made these boho ornaments, and this year I wanted to go with something simpler, and cue my Christmas applique ornaments. These can be made hanging ornaments just by adding loops, but the main idea was to decorate a pillow and use some as tags on my gifts.
Have you made any Christmas ornaments this year?

The pattern in my Etsy and Ravelry shops.


Thursday, December 16, 2021

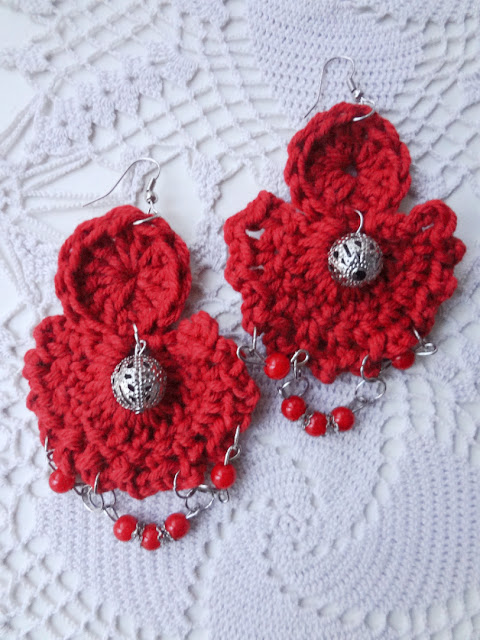
Crochet Fan Earrings-free pattern


Hello lovelies! 
If you are looking for a last minute crochet gift to whip up, look no further. This pair of earrings can be made in a matter of minutes. Decorating them might take longer :)
 
Before we begin with the pattern, please note that: The written  pattern in its entirety along with the photos are for personal use only. All property rights belong to Maya Kuzman of The Little Treasures. You are welcome to sell finished items from this pattern.
 
Supplies: sport cotton yarn and colors of your choice in (I used Phil Cotton 3) and a 3mm hook (UK11) (US 10/3)
Other: tapestry needle to weave in ends and sewing needle and thread for sewing on the beads, as well as earring hooks. For decorating you can use all sorts of beads, pearls, buttons, metal findings, knick-knacks, etc.
Stitches in US terminology: chain (ch), chain space (ch-sp), stitch (st.), skip (sk), single crochet (sc),  double crochet (dc).
Measurements of sample earrings: 6 cm/ 2.36" in length, 3 cm/1.18" of the round circle and 6 cm/2.36" in width. 

Pattern:

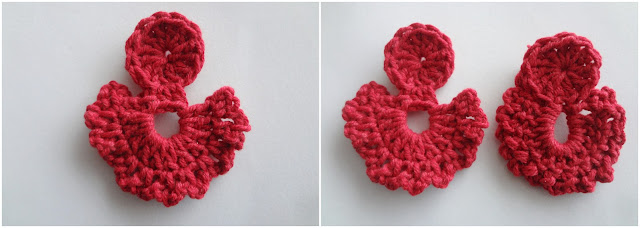
Round 1: Ch4 (counts as the 1st dc (not treble!!) and dc11 in the first stitch of that chain. Sl st with 1st st to end round (12). 
Round 2: Ch7 and sl st in the next stitch.Ch3 and turn work. (the ch3 counts as the 1st dc)
Half-round 1: Dc11 in ch-sp. (12)
Half-round 2: Ch3, turn work and sc1 in next st. Repeat this pattern to the end where you sl st in the last st. to end the round.  And you are done! Work the tails.

Now if you want the circle to be a little bit detached from the fan part, here's a variation. When you finish round 1, ch3 and dc1 in next 2 sts. (3). Turn work, ch7, sk1 and sl st in the last dc. From here work the half-rounds as before.

Add the earring hooks at the top of the circle and decorate the earrings. 

Here's how I made some of mine.


Have fun!

Monday, December 13, 2021

Crochet Emergency Kit
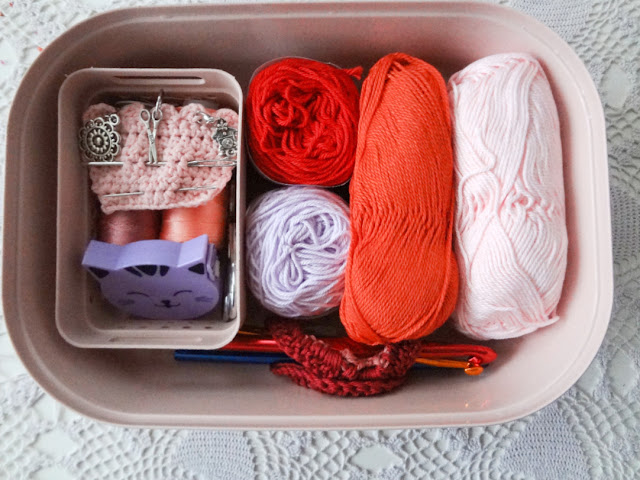


I always crochet while I am traveling across country. And I never forget what I need to productively kill time in the car. As a matter of fact you can read here what I take with me.

I am in a crochet group where many people have confessed to have taken hooks but forgotten the yarn, vice versa, or both while setting off on a trip, so I thought it would be interesting to compose a crochet emergency kit which will actually stay in the car, so as to make traveling more pleasurable. I am sure this will also be a great Christmas gift for your crochet friend. 

So, this is what I included. I took a simple, spacious food container (plastic box) and added a caddy (a small crate in this case) which I filled with sewing thread, measuring tape, scissors, and onto a crochet patch I attached stitch markers, a sewing and a tapestry needle.

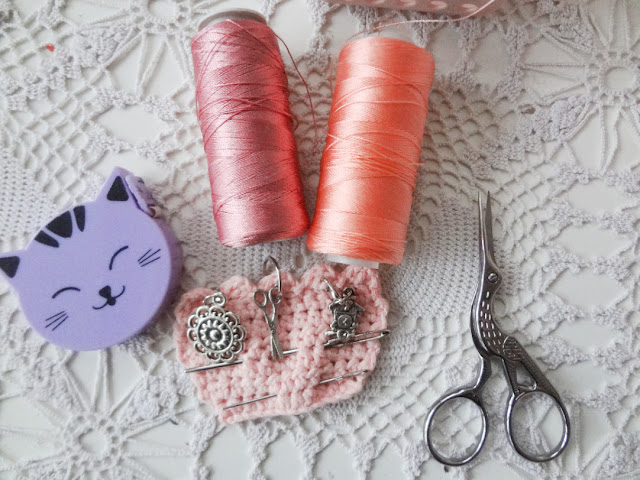
 

Next I filled the box with yarn skeins and cakes, and slid different sizes of crochet hooks through a granny triangle to make the box complete.


The container had a transparent lid, so I painted it over and added my sticker. I played with photoshop here and added a funny crochet phrase: "4 U 2 DC". And that's it!


Do you also crochet while traveling? Do you have a kit and if so, what do (or would) you include?
 

Saturday, December 11, 2021

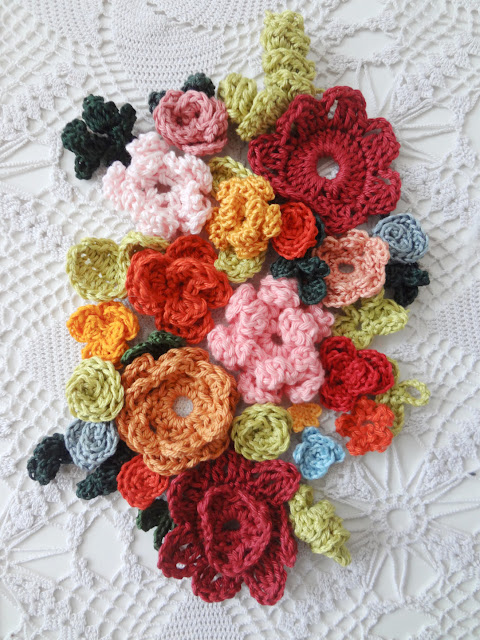
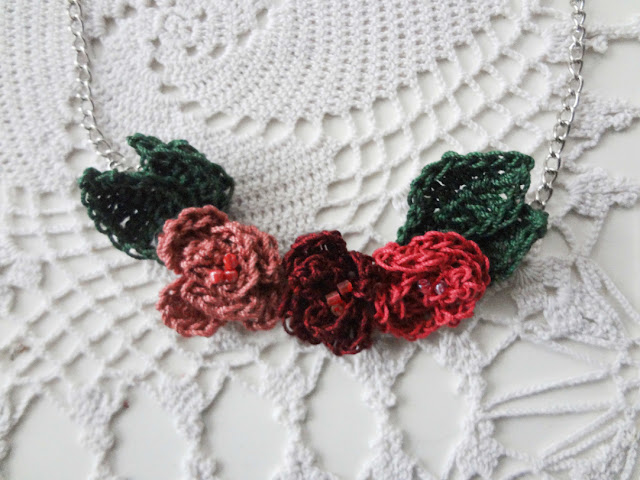
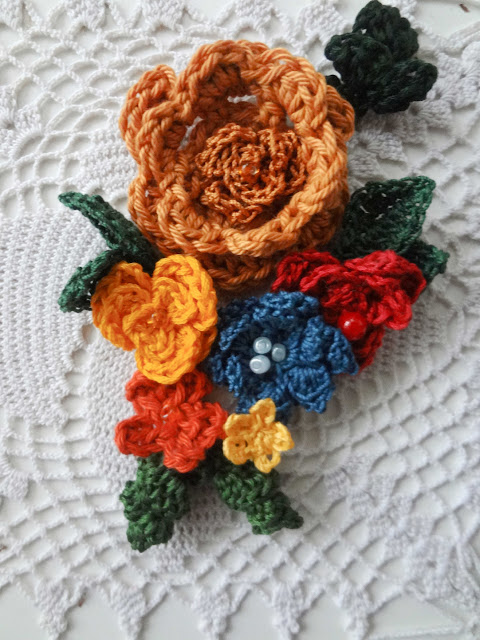
Mini Flower Jewelry - pattern release

This was a project I thoroughly enjoyed composing together, and I am happy it finally came together.

In making the flowers and leaves for this tutorial I mainly used crochet thread and embroidery floss (DMC) with a 1.7 mm hook (UK-/ USA:5), even for the crochet thread which according to the label required smaller hook.  For comparison reasons I also tried the patterns with sport/DK yarn and a 3mm hook (UK11) (US 10/3), and they are beautiful whatever the size :)
 
The tutorial contains 4 flower patterns (with variations), and 4 leaf patterns with multiple suggestions how to use these in creating all sorts of necklaces, brooches, and earrings/ rings.
 
Pattern in my Etsy and Ravelry shops. 


Wednesday, December 8, 2021

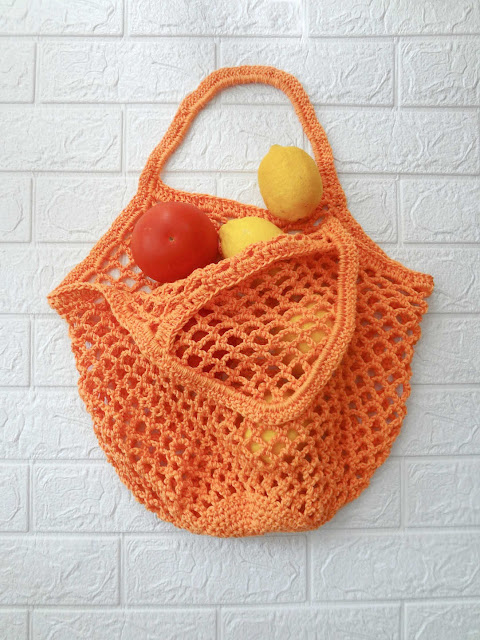
Crochet Market Bag

Starting December 1, only biodegradable bags can be sold at shops / supermarkets and the price of the same is a quarter of one kidney, or in percentages, the increase is 650%. As a green person, I am fine with the law, although it has many flaws and it seems it wasn't thought through well, but who am I to judge. I would have rather they'd banned them all!
 
Canvas and fabric bags have always worked for me, but I was itching to make a crochet bag and here it is. Although it looks small, it can stretch amazingly and it is quite strong. I applaud my DK yarn for that! The pattern for this one is coming shortly.
 
Do you use plastic bags? What's the law in your part of the world?

Monday, December 6, 2021

Handmade Christmas Market #2

 
This is not a sponsored post! 
 
My latest etsy  Christmas gifts finds. A handful, but really cute!
Please remember that whenever you buy from a small business, there is a real person doing a happy dance!  
 
See what I linked to in market #1.


Saturday, December 4, 2021

Gnome Christmas Ornament - free pattern

 
Hello crafty friends!
Today I have a cute little weekend project to share. A gnome ornament.
 
What do you need to make the gnome ornament?
Wool fluff for the beard, wooden bead for the nose,  DK (sport) yarn for the hat and with a 3.oo mm hook, and hot /silicone glue. 
 
Pattern to make the hat with the  following stitches:  chain (ch), slip stitch, (sl st), single crochet (sc), single crochet back loop only (slbo), half double crochet (hdc), half double two together (hdc2 tog). Ch2 at the end of row counts as a stitch.

Foundation and row 1 (we are making the ribbing on the hat): Ch5 and starting from the 2nd st from hook, sc1 in all (4). ch1 and turn work.
Rows 2-6: scblo in all sts. across. (4). Ch1 and turn work. The ribbing is done, now work the upper side (horizontally). Do not cut yarn because we are filling the ribbing horizontally. 
Row 1 : Ch2 (counts as the 1st hdc) and hdc1 in first row. Next, hdc1 in all vertical rows, but the last where you hdc2. (8) ch2 and turn work.
Row 2: Starting from 2nd st., hdc1 all (8). Ch2 and turn work.
Row 3: Starting from 2nd st., hdc2tog, hdc1 in next 2sts., hdc2tog, hdc1 in the last st. (6) Ch2 and turn work.
Row 4: Starting from 2nd st. hdc2 tog two times and hdc1 in last st. (2) Ch2 and hdc2tog with the last st (2). 
Chain 8 (or more if you like the loop to be bigger) and sl st in the last row (the body of the hat) to close the chained loop.
 
 
Cut strands of wool fluff and glue them under the hat. The length of such fluff beard depends on whether you like it long or short. Once that is glued, glue the bead in the middle of the beard, and mind that it is glued next to the hat. 

And that is it! You can experiment with different sizes of yarn. The pink hat in the pictures is made with DK yarn, while for the blue one I used sport yarn. 

If you like gnomes as much as I do, check this tutorial as well. 

Thursday, December 2, 2021

Harry Potter Crochet


My adorable 6 year-old nephew has recently fallen in love with Harry Potter. As he started school this year, he wanted his schoolbag and anything school related to be with Harry Potter.  His admiration for the series is just the cutest!

Now, he doesn't know but I plan to make him Harry Potter gifts for Christmas. There is a wonderful array of HP amigurumi dolls, but I have my heart set on the above one and I am going to use this free tutorial

Next I am going to make him a scarf and maybe, if I manage my time- a wand. I also considered putting Hedwig into the equation, but as I am already taking a big bite with these three, I let it pass. 

Have you made anything Potter related?  


Tuesday, November 30, 2021

Weave as You Work - crochet tip

I have yet to meet a hooker who enjoys weaving ends of a crochet project. 
That is the most dreadful thing if you ask me. I would rather work several rows in a difficult stitch than weave those tails. But in all these years of crocheting, I've urged myself to weave them in - or more accurately - to work those tails over as I go. 
And the difference has been more than rewarding. I now finish a project with scarcely any tails at all. 
 
So this is how I do it. The project in the pictures is a granny triangle, so it involves insertion of several colors, which means many yarn additions, hence more tails. 
I am no friend of short tails, so my beginning and ending tails are always long. That way I can ensure I have the tail nicely tucked in and covered. This being said, I can assure you that I have never had a tail become loose and ruin my project. 

When I join foundation chains to make a ring, and because I am working in the round, I always place the tail on the left (1) - behind the crochet work, and I immediately start working the tail over as I go (2-4). If I use the same color of yarn in the second round, I continue working it over until there is no tail left.


I end previous round with a long tail. When inserting new color of yarn, I never do it in the stitch where I ended. I usually go a stitch or two back and insert the yarn there (5-6). That way I can get a good and strong hold over (now) 2 tails. After a couple of stitches working these tails, I tie both in a knot (7), and continue working them over for a couple of stitches more (8). Then I either cut the first tail or it runs off (9). In pictures 10 (back) and 11 (front) you can see that it was worth working those tails because there are none except for the last one.


I use a tapestry needle to work the last tail (12). I insert the threaded needle through the middle of the stitch that comes first (13), then guide the needle downwards at the back of the work,  slide it through several stitches (14), I tie it into 2 knots at this point, then I slide it through several stitches more (15) and then I cut off the excess. Very easy, clean and neat job, if you ask me.


                                    Back                                                                Front
 
What about you? How do you work your tails? Will you share in the comments please?