Showing posts with label activities for children. Show all posts

Wednesday, March 29, 2017

A Wooden Spoon Doll - creative idea


For her Art class, Eva had to make a doll out of a wooden spool and she asked me if I would help her make one. Well, needless to say the child in me started jumping up and down out of joy. To be honest, this is not the first one we made.
 
When both my children were in kindergarten and junior school, we made dolls out of spoons, but not elaborate and beautiful as this one.


First we constructed the body and filled it with polyfil. Inserted the spoon and sew it all around.
 
Next using a small saucer we cut out a round piece of cotton for the underskirt and added a dotted tulle skirt over it. The "shirt" is actually the bodice which I sew gathered so that we wouldn't have to make a special top. Since we are not experienced in making / sewing doll arms and hands (or legs for that matter) we used a pipe cleaner instead. (We know the arms are too low, be gentle with us!) We added a decorative ric rac sash and a bead necklace to top it all.
 
Oh, yes... we also made a tulle cape. We tried a sateen and a cotton cape but they fell down too heavily and covered the tulle skirt which we think is the best on the doll so we opted for a tulle cape.
 
Beads are used for the eyes and mouth. I crocheted the hair and we especially like the locks.
 
 
So what do you think? Do you like it?
We had so many fun ideas while making this one, it would be interesting to make some more and just give them away as gifts.

Monday, January 3, 2011

Fairies


Ever since I I first laid eyes on the Flower Fairies at the Magic Onions, my heart missed a bit, their spell caught me, their image haunted me and I knew I had to make them desperately.


This is a project that offers instant gratification. And it can be done in a matter of minutes (with the supplies ready that is).


We used these to decorate the Christmas tree, made others as toppers to gifts and also gave some as presents to children. The recipients (mostly children) are completely enchanted by them.


I don't think we are going to store them away with the other Christmas ornaments. No sir!
The kids want them in their room hung on the walls. And Eva expressed a wish to wear one on her school bag. How cute is that?

So, what do you say? Are you going to join the fairyhood?

Saturday, August 7, 2010

Body art - a giraffe and a jelly fish

This is what we did today - a giraffe and a jellyfish.
For the giraffe...

Make a hand impression for the body

(Look at the cute tail)
Then draw a curved line for the neck and make the head
and the ear(s) with the fingers.

Then let those tiny fingers make spots and eyes and a mouth and there you are.
Your own giraffe. Ours is a bit chubby because it cannot
resist mom's cooking, you know.

For the jellyfish you make a hand impression and then press it again slightly away from the first one so that the palm covers a part of the first impression, but take care the fingers not to make marks over the existing ones.


Draw eyes and mouth and it's done.

I highly recommend you let your children experiment with watercolours because hand (and feet) painting can be quite fulfilling and it certainly let children explore their creativity and enhance their imagination.

Friday, August 6, 2010

Body art - a butterfly and a crab


At kindergarten Jakov receives a lovely children's magazine called Rosica with lots of stories, poems and craft ideas. This one is taken from there. It's how to make cute watercolor pictures of animals (or insects) with your hands and feet.

For this cute project you need sheets of watercolor paper and watercolors.

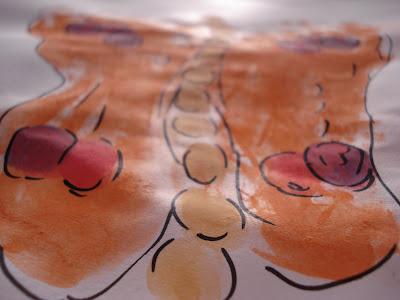
You apply a generous amount of color to your child's feet and press them on the paper one by one because they should be placed in opposite position of the one they naturally are.
Like this.

These are the wings of the butterfly.

Then you add all the details by dipping the forefinger in different colours. Make the body and the spots on the wings.

I like when a watercolor gains a different dimension by simply outlining it with a marker. And here it is. A picture with your child's signature.

For the crab you just have to press the hands joined together with the fingers apart.
The thumbs had to be at an angle but for Jakov this was a bit difficult hand positions (which it is-try it for yourself), so now it looks like the crab had grown horns :)

Add little eyes and a smiling mouth since this is one friendly and good-natured crab.
Tomorrow we are going to make a giraffe and a jelly-fish.