Flower Necklace Tutorial
{Last Minute Gifts}
Skill level: beginner/easy
Time: (less than) an hour
Gauge: not important for this project
*Yarn and hook: crochet yarn
/ 1.9 mm hook
Used terms: chain (ch), slip stitch (sl st.), treble (triple)
crochet (tr), half-double crochet (hdc), double crochet (dc), single crochet
(sc).
* Tip:
the yarn shown in the picture is 3 mm thick so the label suggested I use 1.9mm
hook. Always consult the label on the skein because it gives information about
recommended hook size.
For
this necklace you have to make a nice foundation.
Chain
150 stitches.
When you come to the end,
chain 2 more, turn work and make dc in the second ch from hook. Make dc in
every stitch until the end.
When you come to the end,
don't finish it. You are going to make a loop.
For
the loop, chain 9, make a slip stitch to join the loop with the main body of
the foundation, turn work and crochet in the opposite direction - single
crocheting to fill the loop.
Here it is all worked
down. When you come to the end, make a sl st. Cut yarn, tie a knot and weave
the tail.
For the
closure you may add a bead, a button or crochet a button.
For the
button in the picture, I chained 4, made a sl st in the last to make a ring,
crocheted 4 sc in the ring, continued by making a sc in every stitch for 2-3
rows.
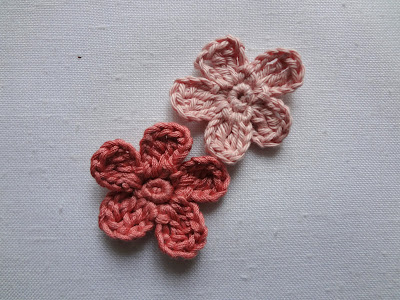
Next - the flowers.
Pattern for the flowers:
Ch 4 and join with sl st to make ring.
Round 1: 4 sc in ring, sl st with last sc to join
Round 2: *ch 4, 2tr, ch 4, sl st* in same stitch
Repeat round 2 for all 5 petals, but start the 2nd (and consequently the others
by making a sl st in the new petal prior to making the ch4)
Cut yarn,
weave ends.
Pattern for tiny leaves:
Ch 6
Row 1: ch 1, 1 hdc in first chain from hook, 1 dc, 1 tc, 1 dc, 1 hdc
You may end here. If you want to make a twin leave just chain 3 more and chain
the leave pattern again. When you finish with the second leaf, cut it
out,secure it, tie a knot and weave ends.
Attach the
leaves to the flowers, and the whole set to the foundation and you are done!
You may
work on your arrangement / design to suit your fancy!
Your gift
will certainly be appreciated!
Isn't it lovely?
Enjoy it!
UPDATE: if you want to donwload this to your computer, you can do so from ravelry


