Friday, March 14, 2014

Crochet Mini Doilies {Necklace and Bracelet} - a free pattern


 I have a special treat for you today. A pattern for the mini doilies. The same one that was published in the Simply Crochet magazine - read about it here.

So with no further ado, roll up your sleeves and gather your hooks.


Pattern requirements

Skill level: easy

Time: 5 - 10 minutes for 1 doily

Yarn and hook: For the main body (the motif)of the mini doilies I used doubled embroidery floss to gain on density, but light and medium cotton thread / crochet yarn can also be used. For the border I used ecru crochet thread, size 30 (20 tex).   

Use a 1.9 mm (B1-E4) hook. However, if you use other sizes of yarn for this project, you should consult the label of your yarn/thread because it always gives information about recommended hook sizes.

Gauge: not important for this project.

Used terms: chain (ch), single crochet (sc), slip stitch (sl st.).


Chain 5 and join to make ring.


Now this is important: DO NOT work into the ring! 
Start crocheting right away in the 1st st. 
That's how there won't be a hole in the middle.  

Round 1: 
Start by making 2 sc in the first stitch, and 2 sc in all the remaining stitches (10).


Round 2:  

2 sc all through the round (20) 
Repeat this round until you are satisfied with the size of the “doily”. End by making a sl st. For my necklaces and bracelets I usually make doilies of 2 to 3 rounds before I make the border. 

The border 


Insert ecru  in the next stitch.

*Chain 3 and sc in next stitch*. Repeat from * to * until the end. When you come to the last stitch make a slip stitch into the very first stitch/ 3-chain you made.


This is the front...
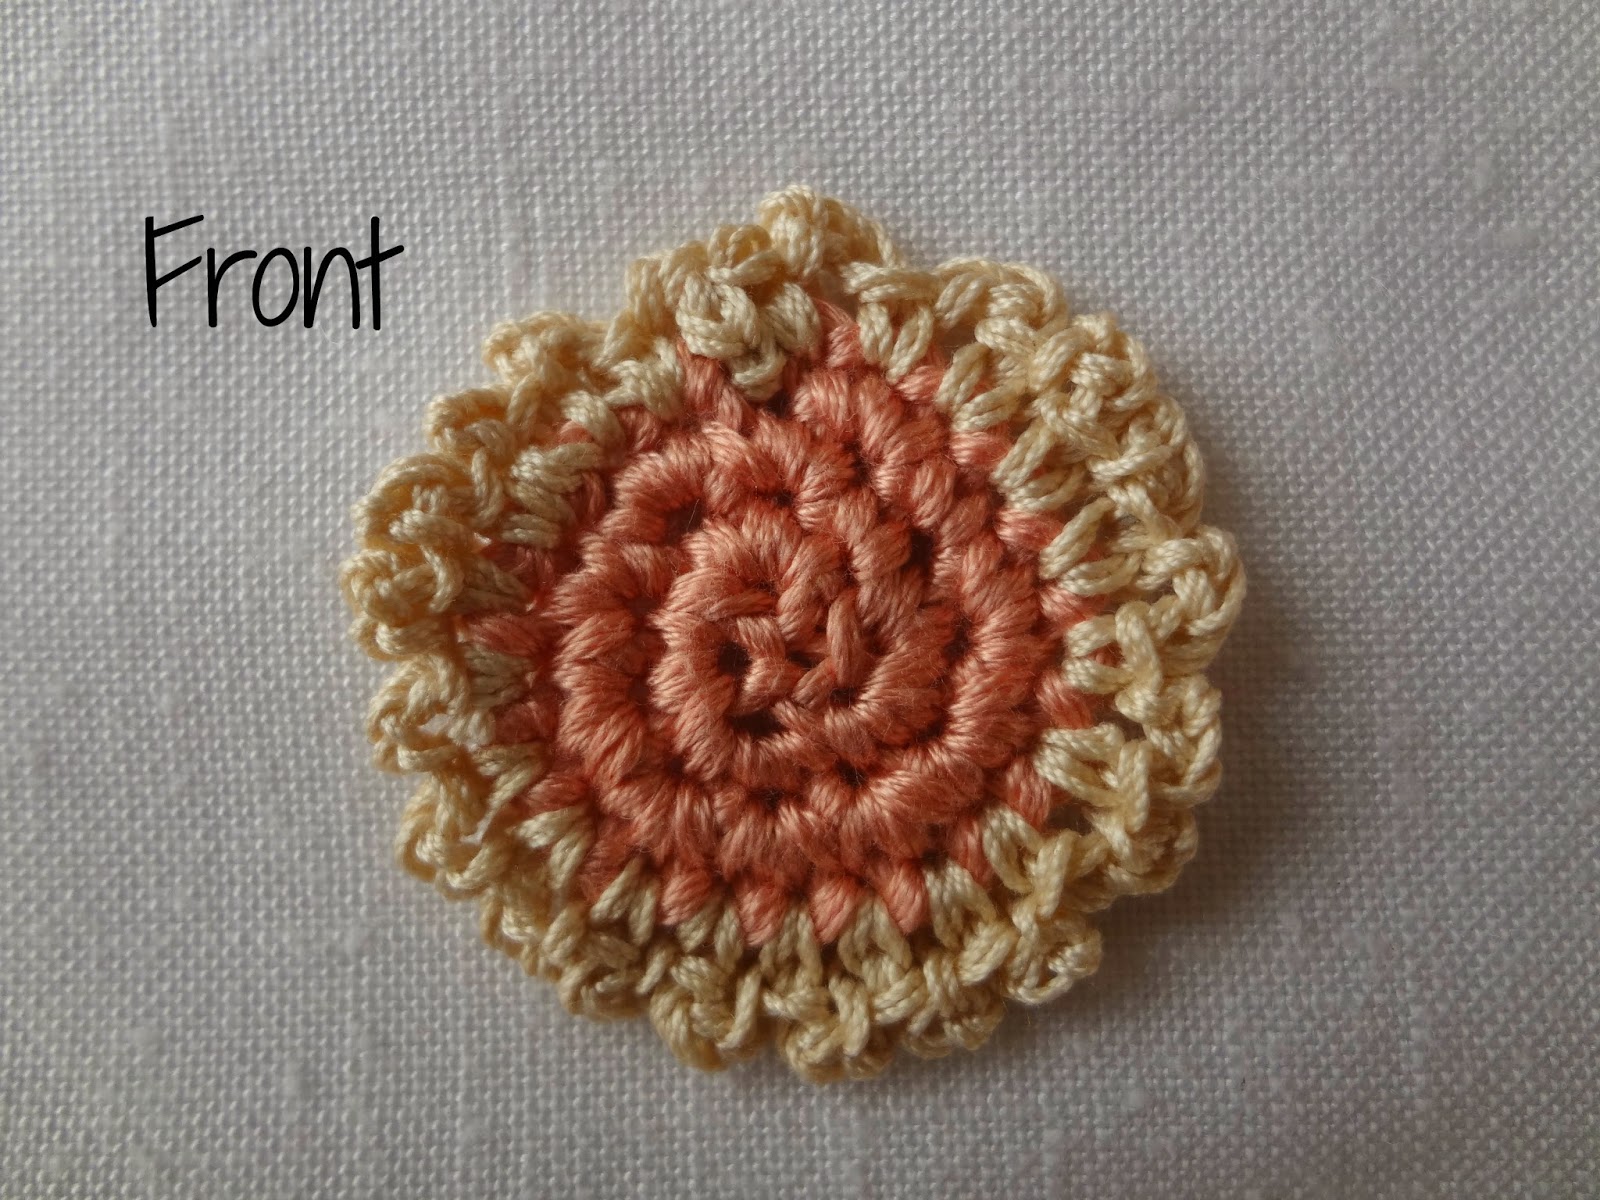


... and the back. Neatly weave all ends.


Joining


To make this style of necklace (and any other you desire) you will need jump rings to join the doilies together. I marked the position of the jump rings for clearer understanding. When it is done, attach a chain to it.

For the bracelet, I usually use two jump rings to join them together lined up and add a small chain and adequate closure (usually a clasp).


For inspiration of other styles and color combinations, check my doilies here.

If you want to download this as a PDF file, you can do so here
If you decide to make them, I'd love to see them! Just drop me a note in the comments.

Enjoy your new jewelries!

Tuesday, March 11, 2014

Embroidery as art


Embroidery or decorating fabric or other materials with needle and thread dates from ancient times and dates back to more than 3000 years B.C. It is probably the first form of art. Originally it was used to patch, mend and reinforce cloth.
As a medium it transcended through times preserving folk techniques and traditional motifs. 
Ancient Egyptians used sophisticated embroidery with white threads on a white canvas very difficult to recreate today even with modern technology. 
Another type of finest quality was the Chinese silk embroidery, known as the two-sided embroidery. It is amazingly intricate and it takes years of hard efforts to complete. 


Also famous is the "raised" embroidery, practiced in the 16th century. It is better known as the Elizabethan embroidery. It involved stitching decorations like butterflies, leaves and other beautiful designs with the usage of wool, leather and wood padding.

Interestingly, in the past, elaborately embroidered clothing, religious objects, and household items were a mark of wealth and status in many cultures including ancient Persia, India, China, Japan, Byzantium  and Medieval  Europe.


However, with the development of modern machines, embroidery has become accessible to everyone, and today its attractiveness is neither diminished nor obliviated and it is perfected to the state of being art.


On the topic of embroidery, just this weekend I bought myself this gorgeous blouse. At first I hesitated thinking that the lace and the needle stitched roses are too much, but in the end I couldn't take it out of my mind and I knew it had to be mine. 
For more swooning embroidery, check out my board here


Saturday, March 8, 2014

Crochet Shamrock Tutorial - free

 
I thought it would be great to celebrate St. Patrick's with a couple of shamrocks so here's a tutorial for  you to crochet a few.
 
With favourite yarn and adequate hook (I used DK and 1.9 mm) :
 
Chain 6 and join to make a ring.
Make 8 sc in ring.
 
 
Round 1: *Chain 3, in the same space make 3 dc, chain 3 and end with a sl st. Make a sl st in the next stitch. Make another sl st in the next stitch* and repeat pattern from *to*.


{Progress}
 
 
When you make all four, leave that stitch alone. You'll get back at it later.
 
 
Round 2: Insert new color in the 3-chain you started with.
Next, increase by making 2 sc in the second and third stitch, sc in the fourth. Cut yarn, tie a knot and weave in the tail. Repeat this for all four leaves.


Here's the back of the shamrock. While you crochet, work over the first tail, so that you don't have to work both at the end.


Round 3: Pick up the stitch you left earlier and *chain 3.
 
 
Make a hdc in the first light green stitch, then make 4 exsc (extended single crochet - explained below) and end with a hdc.
 
 
To make an extended single crochet, yarn over and instead pulling through both stitches, pull only to the first stitch/ loop ...


...then yarn over and pull over through both loops.


One extended single crochet made. Make 3 more.
 
 
End with a hdc. Chain 3 and sl st in the base of the leaf.  


Make a sl st in the next stitch*.


Repeat from *to* for all four leaves.
 
 
When you finish the last one, don't cut off the yarn; instead chain the stem. For that, chain 13. Then turn work and make sc in all the stitches.


 Tie a knot, cut yarn and weave in the tail.


 Happy hooking!

Friday, March 7, 2014

I am over@Illuminate Crochet

Boutonnieres & corsages by Little Treasure
 
Hi guys! Lovely Sara of Illuminate Crochet invited me over at her amazing blog for a little chat on crochet and favourite crochet books and hooks.
Drop by to say hi!

Wednesday, March 5, 2014

Boutonnieres & Corsages


Let me present several of the Boutonnieres & Corsages I've been working on for a while. These are color specific due to a reason.

I always work on several projects at a time. I started a boutonniere & corsage collection a month ago and the end is nowhere near. Aside from this, there is a granny square dress and a baby gift set underway. 


Sunday, March 2, 2014

Celebrating March


Aside for the headbands for the wee ones, I also made some for the bigger ones. For this headband I made a champagne organza rose with a mustard bud peeking behind.


We went out of town yesterday for some fresh air and to stretch our stiffened bodies a bit and I must report there were some trees in bloom and budding. It would be awful if winter stroke back fiercely out of a sudden. It would make such a damage.