Wednesday, March 9, 2016

Embroidered Pendant DIY


embroidery


Welcome to a new addition of the making jewelry posts and this time - just as I announced last week, we are going to make an embroidered pendant necklace.

For this project you need a cotton piece, felt patch, and embroidery floss and needle.

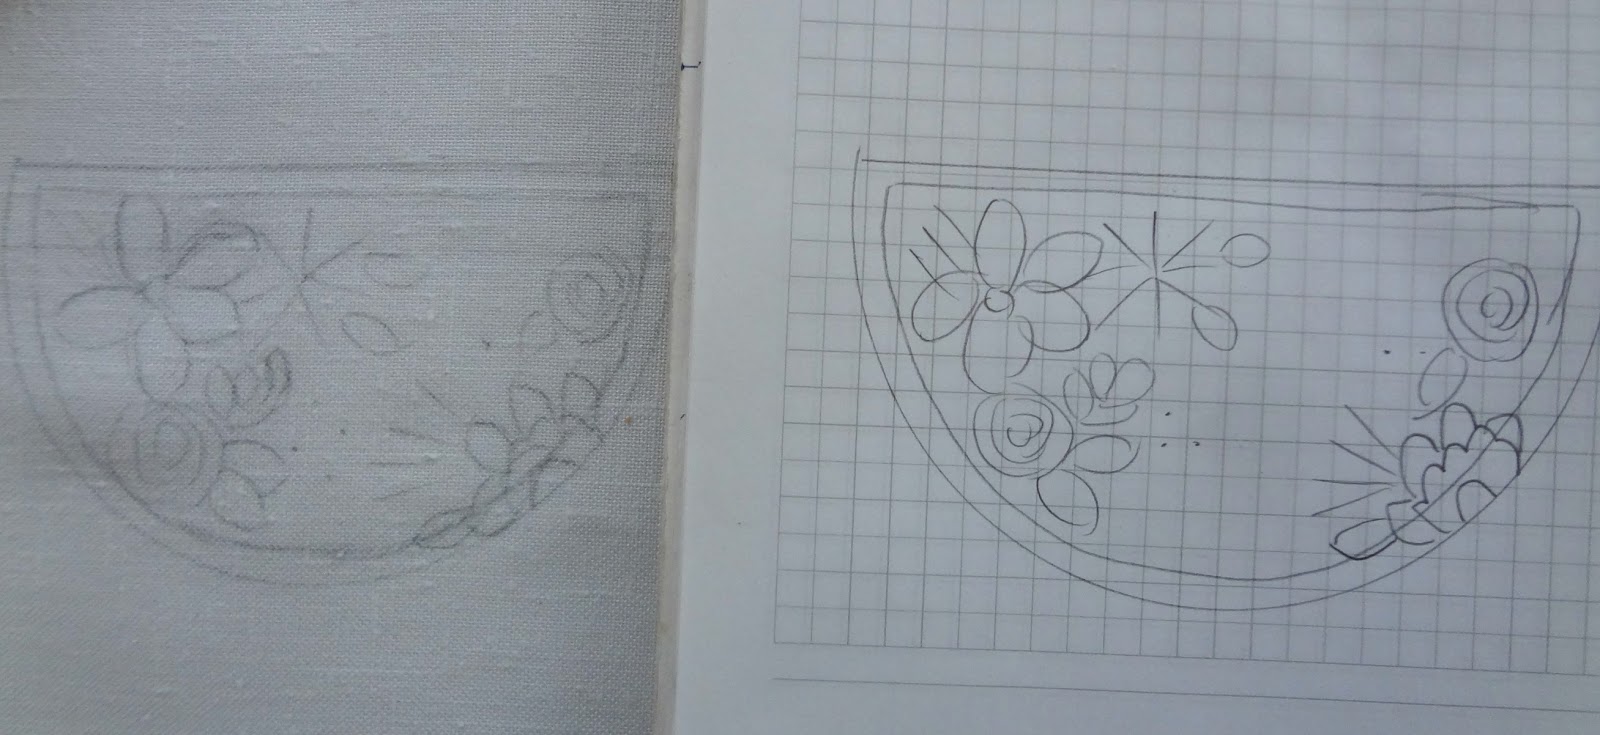
Take a jar lid / tin can lid and draw until you get just a little above the center / middle of it. Draw a straight line to mark the upper edge.


Draw along the outer edges leaving 0.2" / 5mm allowance  for the filled edge.  


Sketch the floral scene and then transfer it onto the cotton piece.


Put it into the loop and choose desired colors.


For my flowers I used DMC / Ljubica (Unitas) floss:
 
1. DMC Yellow 972
2. DMC Beige 739
3. DMC Red 816
4. DMC Green 3346
5. DMC Navy 311
6. DMC Greyish / Bluish (no number) - sorry!
7. DMC Coral Pink 758
8. Ljubica Pink 526
9. Ljubica Orange 450
 
 
It doesn't really matter where you start - I always start working from left to right, so I started with the yellow daisy first.
 
For this pendant I used three basic stitches: the satin stitch, lazy daisy and French knots.
 
Janet has a magnificent blog called Stitch School which I often use as reference for stitches and you can learn how to make the satin stich here.


Next, I used the same color to make some French knots.


For the red rose I also used the satin stitch but I did it horizontally this time (notice the difference between the yellow satin stitch and the red one).


Added the orange one (and the leaves - coming up).


For the navy and the grey flowers I used the lazy daisy stitch.


Worked the flowers on the right side (all made in satin stitch) and I left the coral pink one unfinished because I want it over the edge for effect.


Now this is optional. You can work the edges and afterwards cut the fabric as close as you can to the embroidery work, but I don't like that method because some of the threads are going to peek and it is a really messy job. So this I what I did.


I took the piece off the loop and cut it out - leaving about the same allowance as I did for the edge.


Next I cut out a felt piece for the back - the same size as the pendant without the second allowance. And this is another no-no for me. Since I never glue anything onto fabric especially not on embroidered pieces (not that I haven't tried - it turned out awkward and grose), when filling in the edges the felt back gets filled too. You'll see what I mean - just scroll below.
 
Cut the fabric closely to the edge so that it gets worked better.


Pin the felt patch onto the cotton fabric. Here I finished the last flower. I folded the cotton, slipped it under the felt and satin stitched the center of the flower and the pink petals.


Next, the edge filling.


And that is it. Add jump rings at the sides to which you attach a metal chain and your new embroidered pendant necklace is ready to go :)


Some of my other stitched pendant necklaces here and a here.
 

Monday, March 7, 2016

Spring through pictures


Yesterday was a blissful day! It was just perfect for a nice walk through nature and we went out of town to the nearest village to enjoy spring in its bloom.
 
The hill onto which the village is located is literally swarmed up with blooming trees and flowers so it was quite a sight for sore wintery eyes. Needless to say I was mesmerized and snapped photos to my heart's content.


It is an old village, though not deserted, so I also shot some ruined houses. Those of you who know me, know that I am strangely attracted to old houses being bit by the tooth of time, but I am saving those pictures for some other post.


Before I sign off, let me wish you a happy start of the week and enjoy the blooms from my part of the world!

Friday, March 4, 2016

Tie Into Statement Bracelet DIY


Hello Friday!
I am so, so happy the weekend is here. After a tiresome and stressful week at work I am really looking forward for some walks in nature, fresh air and pink blooms.

But before I sign off let me tell you not to throw old ties away. Why not? Well they make really cute statement bracelets. All you need is a wild imagination and lots of what-nots (think of laces, ribbons, buttons, beads, charms...) to create some amazing OOAK bracelets.

Secondly, the tutorial below does not show you how to stitch the tie like I did with mine, but shows you the general idea of reusing a tie.

1. Take a tie, wrap it around your wrist to measure a nice fit, mark it (pin it).


2. Cut it.


3. The inside of the tie. The back part should be sewn onto the middle heavy fabric piece (I don't know what that is called), so you unpick it.


4. When unpicked cut that middle piece up to 3 cm / 1.2"


5.  Fold the upper layers inwards (up to the cut off part) and pin. You may want to iron so that the edges are neat.
Thread a needle and sew the edges using an invisible stitch.


6. Decorate it. For my bracelet I stitched it with embroidery floss. It wasn't easy because I worked with a silk tie and where I used thicker thread it wrinkled and made folds, but I don't really mind that. Also I added one of the ceramic beads I suffocated you with in earlier posts.
 

7. Add push snaps and you are done!
 
 
This tie was not my original choice - instead I had selected a golden one. I washed it got it ready for transformation and it suddenly disappeared. I turned the house upside down but couldn't find it to save my soul. I am sure it'll turn up now that I posted this and when it does I am going to show you another method of beautifying old ties.


If you try this and post it anywhere, drop me a note - I'd love to see it!

Happy weekend!!!


Wednesday, March 2, 2016

Happy March! - Embroidered Bib Necklace


Happy March to all!

In my part of the world it feels like spring already. Nature is waking up, flowers started to appear, birds are chirping, and it all contributed to an enhanced spring like mood.  And that resulted in this beautiful embroidered pendant I made for myself.

In fact this was one of my planned "Making jewelry" projects - and I wanted to make a tutorial for this, but when I started working I simply couldn't stop until it was done.

However, I didn't discard the idea, so next week I will have the tutorial for this ready.

Enjoy the rest of the day!