Wednesday, March 16, 2016

Make Jewelry: Tribal Necklace


Let's crochet a vibrant necklace today shall we?
 
To make the necklace you need three colors in sport yarn, 1.9 mm hook (hook #5 US), wooden beads (four 14 mm round magenta beads, four 8 mm round pink beads, three 6mm round magenta beads, six 1mm cylindrical magenta beads, four 3mm pink cubes.
 
There is an absolutely fantastic site I found where you can measure your beads. It's called the BeadsGalore.
 
You also need these crochet pieces.


Sharpen your hooks!
 
With color 1, chain 5 and join to make a ring.
Round 1: sc2 in each st in the round (10)
Round 2: sc1 around (10)
Round 3: Insert color 2 in back loop of the stitch and sc2 in each stitch in the back loop only (20)


Round 3: ch 3, sk a st., hdc in next. Repeat pattern in bold 3 times then ch 3, sk a st and sl st in the next st. Cut yarn, tie a knot and weave tail. This pattern is for the two small pieces.


For the central, big one, repeat the same pattern  as above and continue with
Round 4: sc1 in all stitches around.  
Round 5: Insert color 2 in back loop of the stitch and sc2 in each stitch in the back loop only (40).
Round 6: ch 3, sk1, dc1 in next st. Repeat pattern in bold 4 times then ch 3, sk a st and sl st in the next st. Cut yarn, tie a knot and weave tail.


The central piece is made. Next, take a strand of yarn, double it and insert the middle through the center of the crocheted piece, slip the other end through it and tighten it.


Add beads as shown in picture 14. Tie a knot to secure the strand. Skip a chain space both from left and right and string some beads at the sides (picture 15).
 
Cut a very long line (mine was about 1.5 m). At the upper left corner, insert yarn and chain 13 (pics 16/17).  


Pull yarn so that you can bead the cubes and cylinders and on the other end, make a loop and start chaining again. Chain as long as you want your necklace to be.

 
Over the cubes and cylinders sew the small crochet pieces and bead the other set of beads (pic 23). Do the same for the other side.
 
Now for one of the sides make a loop and on the other sew a bead or a button and you are done.


Have fun!

Monday, March 14, 2016

Roses in Bloom - Cuff Bracelet Pattern


I am so happy to show you my newest cuff bracelet. I called it Roses in Bloom and I believe I managed to capture the magic of the spring blooms with this one.


More information about it on etsy, ravelry and Little Treasures.
 

Wednesday, March 9, 2016

Embroidered Pendant DIY


embroidery


Welcome to a new addition of the making jewelry posts and this time - just as I announced last week, we are going to make an embroidered pendant necklace.

For this project you need a cotton piece, felt patch, and embroidery floss and needle.

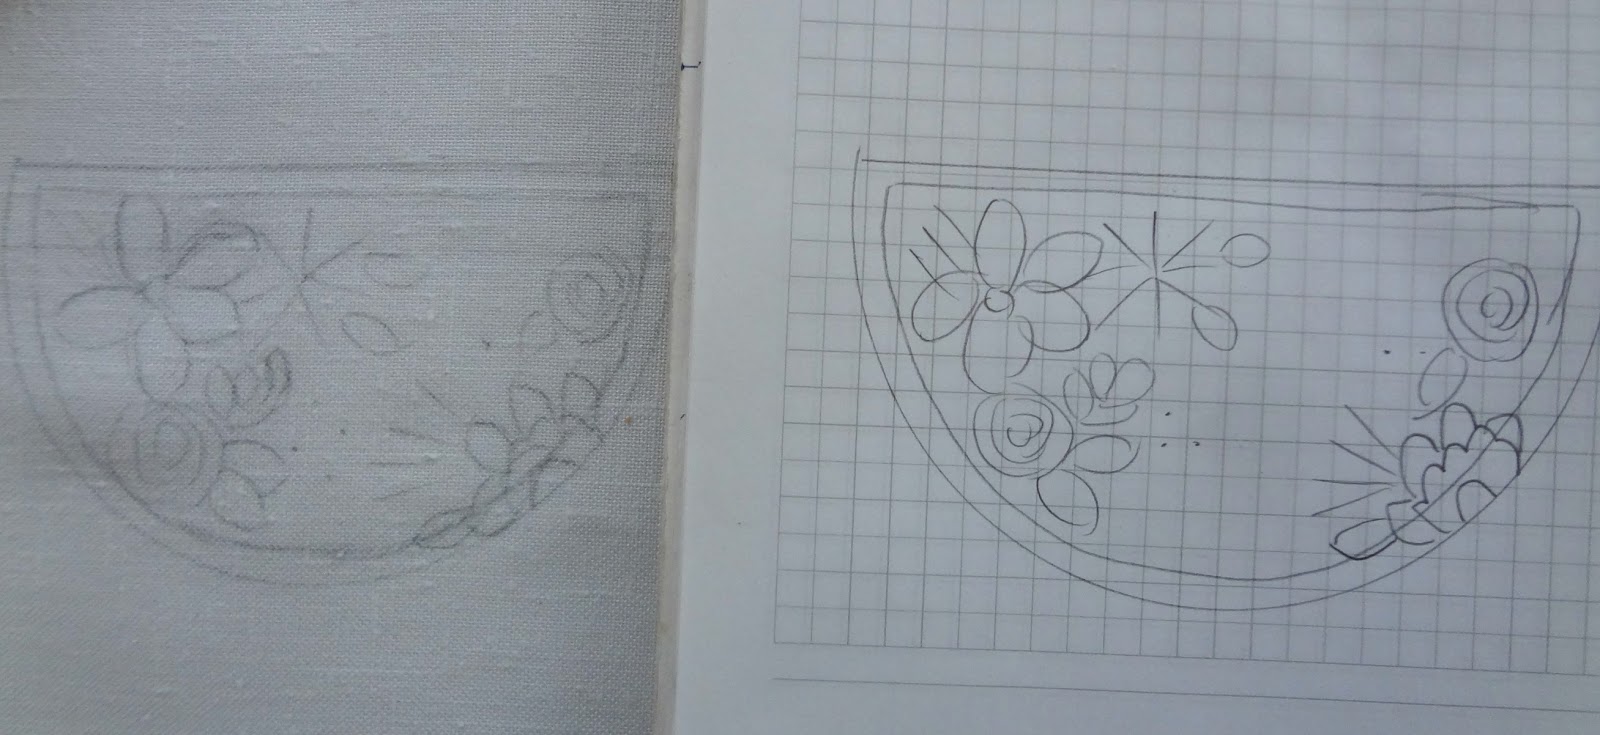
Take a jar lid / tin can lid and draw until you get just a little above the center / middle of it. Draw a straight line to mark the upper edge.


Draw along the outer edges leaving 0.2" / 5mm allowance  for the filled edge.  


Sketch the floral scene and then transfer it onto the cotton piece.


Put it into the loop and choose desired colors.


For my flowers I used DMC / Ljubica (Unitas) floss:
 
1. DMC Yellow 972
2. DMC Beige 739
3. DMC Red 816
4. DMC Green 3346
5. DMC Navy 311
6. DMC Greyish / Bluish (no number) - sorry!
7. DMC Coral Pink 758
8. Ljubica Pink 526
9. Ljubica Orange 450
 
 
It doesn't really matter where you start - I always start working from left to right, so I started with the yellow daisy first.
 
For this pendant I used three basic stitches: the satin stitch, lazy daisy and French knots.
 
Janet has a magnificent blog called Stitch School which I often use as reference for stitches and you can learn how to make the satin stich here.


Next, I used the same color to make some French knots.


For the red rose I also used the satin stitch but I did it horizontally this time (notice the difference between the yellow satin stitch and the red one).


Added the orange one (and the leaves - coming up).


For the navy and the grey flowers I used the lazy daisy stitch.


Worked the flowers on the right side (all made in satin stitch) and I left the coral pink one unfinished because I want it over the edge for effect.


Now this is optional. You can work the edges and afterwards cut the fabric as close as you can to the embroidery work, but I don't like that method because some of the threads are going to peek and it is a really messy job. So this I what I did.


I took the piece off the loop and cut it out - leaving about the same allowance as I did for the edge.


Next I cut out a felt piece for the back - the same size as the pendant without the second allowance. And this is another no-no for me. Since I never glue anything onto fabric especially not on embroidered pieces (not that I haven't tried - it turned out awkward and grose), when filling in the edges the felt back gets filled too. You'll see what I mean - just scroll below.
 
Cut the fabric closely to the edge so that it gets worked better.


Pin the felt patch onto the cotton fabric. Here I finished the last flower. I folded the cotton, slipped it under the felt and satin stitched the center of the flower and the pink petals.


Next, the edge filling.


And that is it. Add jump rings at the sides to which you attach a metal chain and your new embroidered pendant necklace is ready to go :)


Some of my other stitched pendant necklaces here and a here.