

There are many kinds of cutwork, the simplest being Broderie Anglaise while the most elaborate of all is the Reticella cutwork. Reticella cutwork is the ultimate and most elaborate of all cutwork. It is just one step away from needle made lace.
The basic steps into employing cutwork are the following:
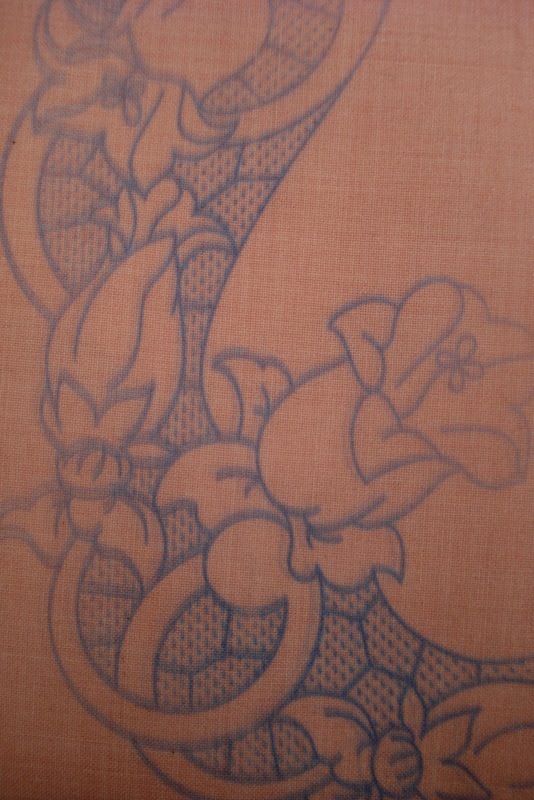
Transfer the pattern onto a cotton or linen which is the best fabric for cutwork.
Use the reinforced stitch to stitch all around.

Work the bars exclusively on the surface of the fabric. Make two or three strands. The more strands the thicker the bar. You decide the size you want.

Start filling the bars. When you come to the other end, secure it by intertwining the embroidery floss into the neighbouring stitches.

Next, you are ready to cut into it.

Cut carefully, and mind not to cut the bars.

Use the buttonhole or satin stitch to embroider the piece tucking the cut-out piece underneath. Some people do all the needle work first and when finished do the cutwork, which should be immensely precise or you may cut into the stitched part and ruin the work. However, I find the tucking method much safer and the look neater.

Tomorrow I am having a tutorial for making multiple bars. Do come over if you like cutwork.
Also I would like to thank you all for the lovely comments left on whip up and the e-mails that encouraged me to dwell more into this lovely segment of needle work. See you tomorrow.
15 comments:
This is so gorgeous and such intricate work, Maya. I'm amazed. So interesting.
Maya! How pretty this is and you make it look so simple!!
Even with your explanations, this looks like pure magic to me. I totally feel unable to do that, be so precise and patient. I really admire it!
Maya! Thanks for the lesson! One day, when I have some time, I will give this cutwork embroidery a shot. I would start on something really small to stay encouraged and not be overwhelmed!
wow! this is so wonderful!
thanks for visiting my blog.
i am inpsired bij the many beautiful crocheted things i see on your blog!
yow know, I think my embroidery aunts use to do this but they call it Richellieu (as the cardeal in alexandre dumas' books, and well in France's History!). It fascinated me but also frightned me how much time it was necessary! They embroidery first and cut at last. I allways hold my breathe!
This is amazing! You are one skilled lady. Thank you for sharing your post with us!
Papgena: Yes, that is right. Certain cutwork is referred to as Richellieu since he - the Cardinal Richelieu, the principal minister to Louis XIII, wanted France to become totally independent. He imposed a duty on all imports and made certain that many Italian lace-makers were made comfortable in France. They taught lace making, and France became a leader in the field.
I have a (white) tablecloth in Richellieu shown in the post for whip up.
Wow!! You made this? I am so impressed!! It would be so cute to have this embroidery around neckline of blouse or dress! I have to learn this skill! Thank you for sharing such a beautiful work!
Lovely work, once again, Maya! And a very clear tutorial -- thank you! Do you primarily use pre-made pattern transfers, or do you design your own?
Thank you Sus :)
For table clothes /runners/linen/ I use iron on transfers while when it concerns clothing I prefer making my own designs!
Maya - re a couple questions re the last couple of comments, I am sort of new to embroidery (1) what do you think is the best way to transfer a pattern? I really haven't got this figured out, I saw some people using light boxes and windows - is this how you do it and (2) if you make your own pattern do you do the same? I really want to start on a couple of projects!
PS this is all so beautiful, as always!!
KJ- Thank you on the lovely comment!
As for transferring the pattern there are iron-on transfers although light boxes / windows are also widely used. I use iron-on transfers for table runners and cloths, while for accessories, I use embroidery transfer paper. It can be find online.
I saw your guest post on Whip Up last week and I was thinking about giving this a try. I haven't done any kind of drawn or cut needlework since I did a sampler with hardanger a really longer time ago. It looks like in your pictures you are using a single strand of embroidery floss. Is that so?
Seanna Lea: Yes for this one I used a single strand of embroidery floss!
This kind of floss is as such -single-stranded one. If you like to use other embroidery floss (the one that is composed of six strands) and want to achieve a fragile look then you may take out three strands for example, while for a more robust fell and appearance - and stronger of course- you may employ the floss as a whole. I hope I made myself clear. If not, please ask.
Post a Comment