Thursday, April 7, 2011
On Fabric chicks and clay eggs
As Easter is just a few weeks away, I have been making small Easter related projects.
This year the decoration storage box gets a new addition: Easter fabric chicks. I love them especially the fabric - so cute! The children couldn't keep their hands off! I hand sewed them and quite enjoyed the process. There are other besides these two in two different fabrics but I am not really satisfied how they turned out. The reason for this is that I used sturdier fabric to make the others but after they were done I saw that I should have used softer fabric (preferably cotton). Lesson learned!
Their nest is full of tiny clay eggs I made maybe 20 years ago and I am sure there were a lot more since I aimed to make them in every possible color (as you already know that about me) but I guess they got scattered away during the years. None is of the same size and pattern (and shape for that matter); nonetheless I find them quite appealing.
Monday, April 4, 2011
Batman and the Queen of Hearts
Jacob wished to be the Batman, and I, pledging to live a handmade life, instead of saving my sanity and buying a costume as any other normal person would do, I went to the fabric shops to pick jersey for the bat and sew it myself.
His costume is not the original of the Batman costume and it consists of a blouse, pants a cloak and the mask. We didn't have a belt because he didn't want one. Someone said Batman had tights but I wanted Jacob to feel comfortable so I made him trousers by copying the pattern of one of his older pants. For the blouse I used an Ottobre pattern. I designed the mask myself (as it can be seen) and as it always happens with time I ended up hand sewing the ears at 4 in the morning only to be told a couple of hours later that the little Mister feels awful with the mask on and he would rather not wear it!! However he put it on for the photo (willingly).
All in all I loved making the costume because Jacob loves wearing his costumes when he plays with his toys and that compensates for all made efforts.
This year my Principal asked us the teachers to participate and wear costumes ourselves. I (being a great fan of costume parties but still lacking time to prepare myself and get a more professional costume) decided to use a part of Eva's last year costume - The Queen of Hearts. I made a boat-neck blouse using a Burda pattern, snipped the lower part of the dress, hand sewed cards on it, made an obi belt and hastily sewed the edges of a rectangle piece which was to serve as a cloak. Painted a heart on the mouth and I also had a heart birthmark on one of my cheeks. There was a heart shaped ring but no crown to save my life.

Friday, April 1, 2011
Fairy princess
Suddenly a twinkle and sparkling dust reveal the Princess of the fairies.
This day was expected with a skip of the heartbeat and building anticipation because children's hearts yearn to escape into a magical ethereal world...
For the April's Fool mascquerade Eva was a Fairy Princess.
She's wearing a pleated blouse with an Obi belt and a two-layered skirt. The bottom part is velvet while the upper is organza. She didn't have any particular wishes of how to paint her face, so I painted it on the spur of the moment.
However, regarding her hairstyle she wished a braid on one side and little whirlpools on the other. Fascinator added for accentuated effect.
My daughter...my beauty... my fairy princess...
Monday, March 28, 2011
Saturday, March 26, 2011
For a cheerful weekend
Here is another week end as fast as the next one. I hope it was joyful and fruitful as mine was.
Monday, March 21, 2011
Crochet a ring - a tutorial
Ok. Today I managed to make the how to I'd promised in my last post.
Now, here is a short (extremely easy) tutorial showing how to crochet around a ring with unambiguous explanation and without any technical terms. This is how I do it.
Step 1: Tie the thread around the ring and leave a short tail.
Step4: Continue working in this fashion until you reach the end.
When you do, finish off the thread by passing the cut end through the last loop.
Pull it firmly and then thread a needle and tie both ends.
Step 5: To weave it, pass the needle through the last loop and
do the stitching back and forth for a couple of times under the crochet seam.
This is the finished ring.
Saturday, March 19, 2011
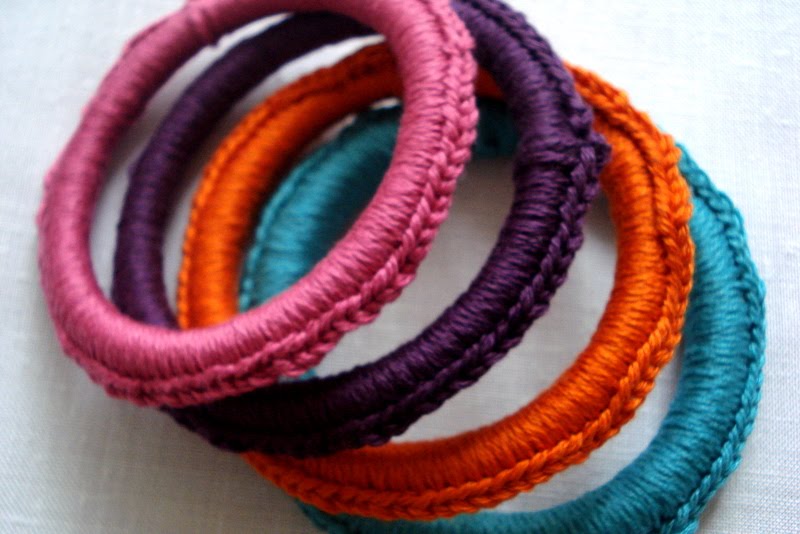
Crochetted bangles
Lying around were several plastic bangles in unattractive colors tempting me to do something about them. And I did. Ever since I made this necklace I was itching to crochet around something and even considered doing this (how ingenious is this??) but was afraid I might alarm the neighbours so I dropped the idea.
I like how my bangles turned out and in fact plan to buy some more and crochet them!
While doing that I snapped a few photos planning to do a small how-to but since both Eva and Jacob took the pictures (the latter crying that the older one got all the important tasks) you may imagine how they turned out so I will post it tomorrow. That is if I get to bribe an adult to take the pictures.
Important info: I forgot to mention but the letter has had quite an impact and the sewing machine got fixed that very week. Sewing under way!
Talk to you soon!
Friday, March 18, 2011
Monday, March 14, 2011
Cutwork: finishing techniques
Some final notes and suggestions about finishing cutwork.
If you want to use the cutwork as an accessory or applique cut it out along the outer edges - a sharp cutter is most appropriate - paying attention not to disturb and cut the embroidery. There may be tiny peeking fibers which you should pluck out.
Then the piece should be washed and starched to gain firmness.
Even better than starch is if you interface the piece in the first place, which I did after I was finished with this one and since I am working on another cutwork project, I must say the interface was the real thing.
When dried press it with a hot iron to make it neater.
Enjoy your work!
Thursday, March 10, 2011
Cutwork: multiple bars
Subscribe to:
Posts (Atom)


Donate