Tuesday, January 20, 2015

Paper napkins into craft background


Today I made paper napkins backgrounds for shooting my jewelries or other small projects. This is something I long wanted to try mainly to preserve and keep some of my vintage paper napkins. You see, as a little girl I used to collect paper napkins. I had them well into my teen age and then gave out many to friends and younger cousins but kept some dear with me. For example the above floral napkin is about 40-50 years old and on the picture below you can see the tooth of time upon it.

For this project I used some of my old paper napkins.

 
First I ironed them on low heat to straighten up the creases, then I took a cardboard and applied craft glue on the sides only because glue makes paper napkins wet and unusable, so I wasn't risking ruining them.
 
With a tissue I wiped the excess of glue and carefully applied the napkin. This napkin is one of my newer ones and I wanted to use it whole - for larger projects. I left it aside to air dry before use.


Or you can make only little squares out of the napkins as I did with these.


I hope I can use them more in the future.


Sunday, January 18, 2015

Pom - Pom Bouquet - how to


Hi guys! To continue my play with the pom-poms I made a bouquet. It is such an inexpensive and easy project and it also gives so much warmth and beauty as a décor.
 
This is in fact a short how-to  - not that there aren't any on the internet - but this is the way I did it. 

For the project I used fabric yarn, yarn pom-poms, plastic sticks (taken from artificial flowers - or you can use wooden sticks instead) and a liquid silicone glue. 


I applied glue on the stick and insert it deep into the pom-pom.


When you are done with the others, gather them all together, hold them tightly and at this point you may tie the sticks together before adding the fabric.


Gradually, as you work your way down, add glue on the sticks and roll the fabric around the stems.
 
 
Roll it down. Then add glue on the fabric and without cutting off the yarn, work your way up, adding another layer of fabric. Work all the way up to the base of the poms. Ant that is it!


A fab, eye-catching pom-pom bouquet!


We are quite satisfied with how it turned out and hope we can use it as a photo prop too.

Friday, January 16, 2015

Vintage Embroidered Tablecloth


Here's my vintage embroidered tablecloth I got from my MIL. It was masterfully embroidered by her mother and if you remember, I showed a sneak peek of it here.

What makes me happy is that it is in mint condition without any holes or stains, and from what I've learned, it wasn't used a lot, I cannot imagine why!

{Upper corner side}


{Lower side view}


After I took the pictures, I just sat and looked at it like mesmerized because it is really stunning. Right now I am very much into embroidered roses and actually working on a textile project involving roses I hope will turn right.

Have a lovely Friday evening!


Wednesday, January 14, 2015

I didn't throw it away - Blog Train Entry


This wondrous jacket is more than 40 years old. It was brought as a gift to my mother from my uncle who traveled the Orient.  

I inherited it while at the uni and I remember wearing it dearly. It was the right thing to throw on over a tee and jeans and head out. Not to mention that it had quite a stir among my friends - it was original, it was hip and it had a mysterious feel around itself.

I have kept it - as many of my mother's clothes- because of the beautiful memories I have with it, because it sparks my desire for foreign travels, explorations and adventures and keeps it aflame, because to me, it is a real treasure.  


The other thing why this is a real treasure is the craftsmanship and authenticity. You see, this jacket was made in Isfahan, Iran. Isfahan, once the capital of Persia is protected by UNESCO as a World Heritage Site and the city is also famous for its wide variety of historic monuments and is known for the paintings, architecture and history.  

 
I haven't worn this jacket for many years. It shows sings of severe wear and tear. From all the washings it's seen it lost its colors. As you can see, I tried rejuvenating it with fabric markers. I worked only the right hand (or the left as you see it here) panel just to see if it works, but I am not satisfied how it turned out so I left it until I find ink or some kind of other markers that will work on the fabric. I plan to make it fully functioning again, because I cannot describe Eva's reaction when she discovered it, neatly folded in my wardrobe.
 
So I guess the story of the jacket will repeat itself, until one day - if you know the story - we don't make a button of it :)
 
*This story was supposed to appear in "The World In My Wardrobe" Series, but apparently it was meant to appear in this blog train instead.


This post is part of a blog train hosted by Agatha from Green Issues by Agy on "I Didn't Throw It Away".
We have become such a throw-away society, but there are some things in our households that we still keep. Why is that so? Perhaps this blog train can unlock the reasons behind it! Follow the daily posts on this blog train and read about the stories behind the things we have kept for many years and why we didn't throw them away.

The next to participate the blog train is Stephanie of  Swoodson Says


Monday, January 12, 2015

Crochet Motif Wall Ornament


Here's a free motif pattern I found online which I used to make wall ornaments.


It's easy to make but I would recommend you make the ring bigger - instead of 6 I chained 9 for it. And to make it more appealing I made it in three colors.
 
You can use the motif as applique, coaster or ornaments. 


Saturday, January 10, 2015

How to Read Granny Square Charts


Hi guys!

Here's the second part of how to read crochet charts, and for this time I chose a basic granny square pattern. A fairly easy granny - not complicated at all. It consists of 4 rounds each marked with a different color. The symbols (for you beginners) are given below. So, let's start.


I separated the rounds for easier understanding. First there is the chart for the relevant round and after that the photos and the written pattern (or the reading :) at the side. Follow the instructions below.


I hope this was intelligible and that you enjoyed it!
For the next time I thought a granny with a flower center would be interesting.
 
If you have any granny pattern chart you would like deciphered, send me the link and I'll try to write it down.
 
Have a lovely Saturday evening!


Friday, January 9, 2015

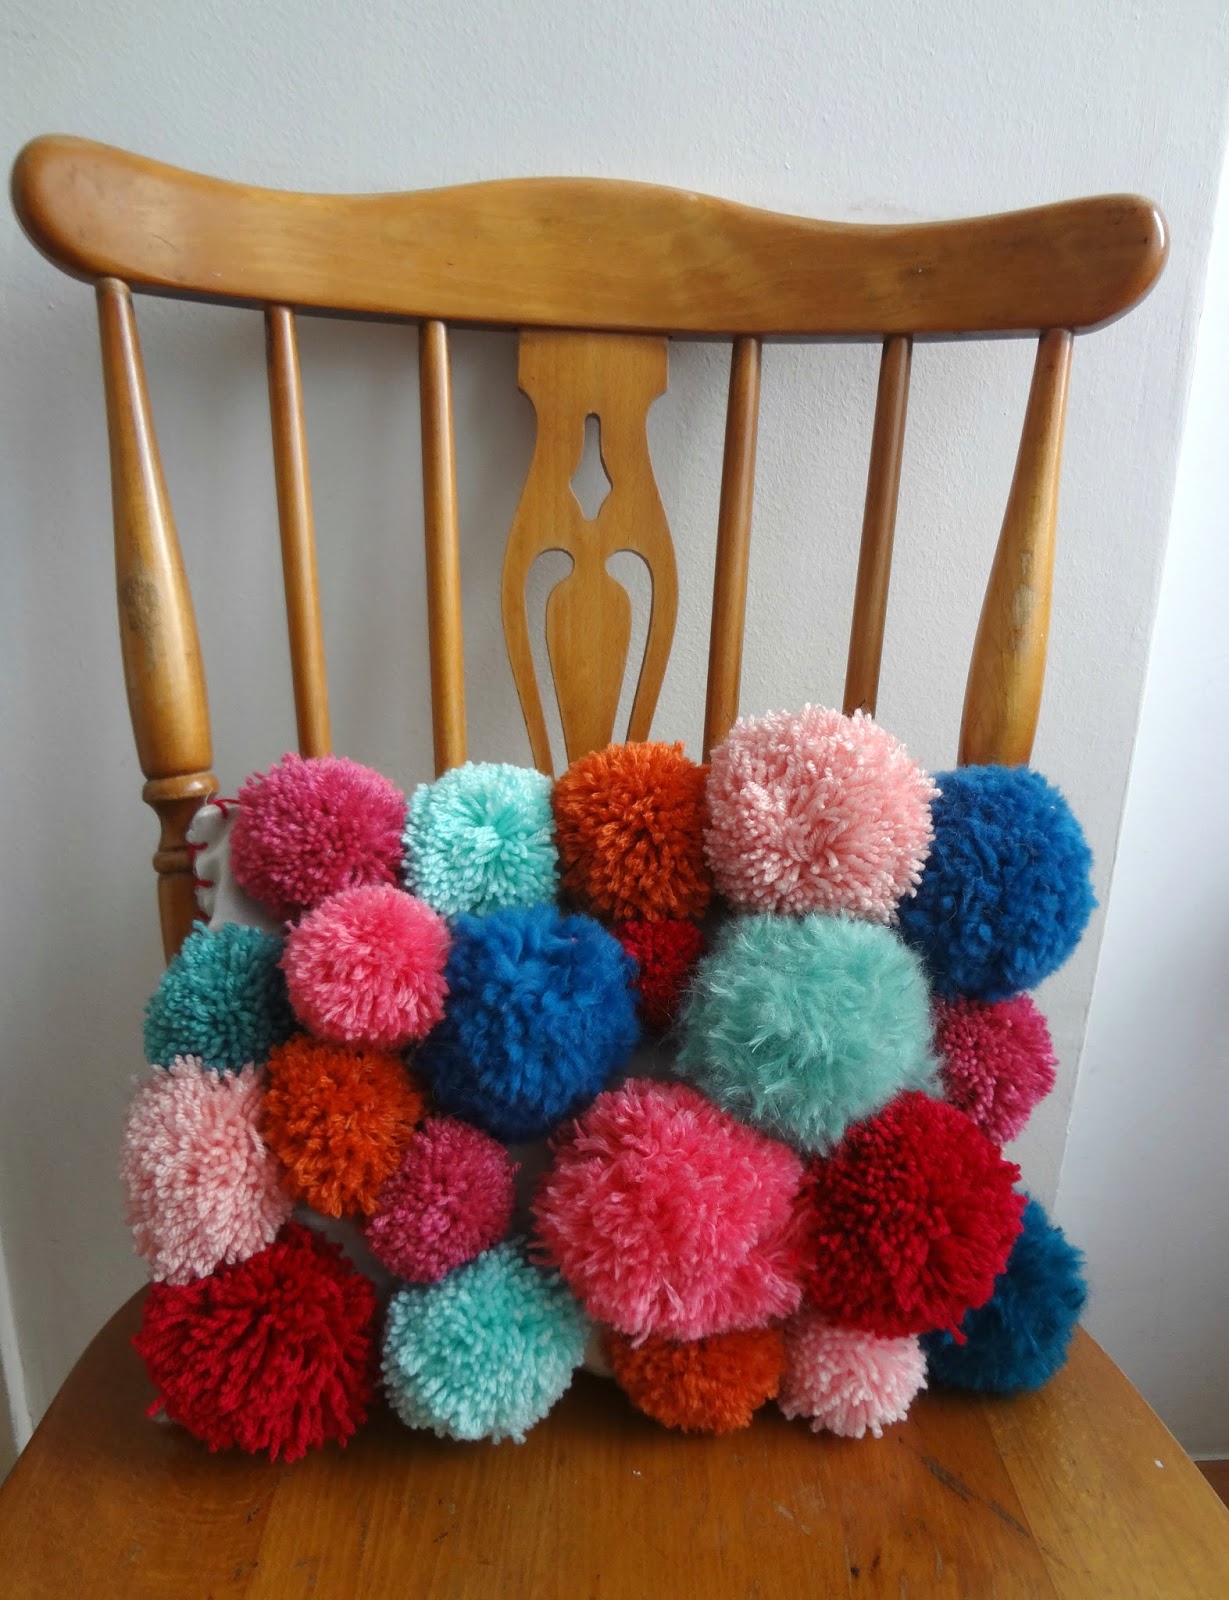
Pom-Pom Pillow DIY


Hello all!

I give you our latest mother-daughter collaboration.
A pom-pom pillow we saw on the internet and the idea stuck with us so we decided to make this as a cheeky decoration for Eva's room.

For our project we used an old pillow, which was my husband's when he was a baby. And we finally got to use our pom-pom makers which came into 4 different sizes.

First we took off the embroidered cover and were left with a nice sateen pillow. We unstitched it at the sides to take off the filling. We already had our pom-poms made (if you are interested in using these pom-pom makers,  I highly recommend it - they are super easy to use. Here's a tutorial how to use them.


First we provisionally designed the look. Then turning the pillow inside out and using a tapestry needle we threaded the pom-pom ends (we left them longish) and tied them into a  knot .

The thing with the tying is that it only works with small pom-poms, because the tie is not sufficient to hold the big(ger) ones in place - they swayed,  so we had to revert to our trusty glue gun, which I must openly say that I hate using in textile related projects. But it aided completing our project.
 

We put back the filling and stitched it. I added the blanket stitch around the whole piece.


What's most important, Eva likes it immensely!

Since I have other pom-pom projects planned I might as well announce January to be a pom-pom month for the blog :)

Next, another installment of the "How to read crochet charts"! Stay tuned!


Sunday, January 4, 2015

Romantic Flower Headband


Well here we are, day 4 of the new year as I am writing this post, and I have my first project ready to show.
 
There is a story behind this headband and it goes like this.
A lady comes across a picture of my sea green headband on pinterest or some other site but only learns my (blog) name with no link to the actual headband.
 
She tries to find it on the internet and connects with knitting and crocheting forums, asking questions about my blog, and someone gives her the link to my blog. That link has brought traffic to the brim.
 
After that she writes me a mail asking for the pattern, but there is no pattern for that headband, that is until now.
 
The thing is that the lady has had an open heart surgery and being enormously satisfied with it as well as with the post-op treatment, she wanted to crochet headbands for the nurses and the doctors as gifts. And she fell I love with this particular headband. She even asked me to drop her a note if I ever make it so that she could be the first to buy it. Of course, knowing the story, I wouldn't have accepted that and since I couldn't get the story out of my head, I made the tutorial today and sent the pattern as a gift.
 
This pattern is a bit different from the original one, with the center part having a more intricate texture, and to be honest, I like it more than the other one.


The pattern is on etsy and ravelry