Thursday, September 30, 2010

Phellodendron necklace


Exploring further the gifts of nature and in regard to my organic jewelery series, for this project I ventured into the magnificent family of Phellodendron or more commonly known as the cork tree.

For this necklace I sliced the cork and used different embroidery thread to embellish the surface.
Don't they look like small crocheted granny circles?

Although its construction was quite exhaustive, time consuming and painful (my fingers still ache), it was really worth making.
Along with my Melon necklaces this is the second, most favourite piece.

I can even wear it as a bracelet.

Credits:
I would like to thank Mr. Thimble who proved quite a helpful assistant in my persistent efforts to conquer the cork and make it succumb to the will of my embroidery needle.

I would also like to thank Mrs. Needle who acted strangely sometimes and faltered on the way through, but was strong enough not to break during the process.


You don't think I could've stopped myself making just this one?!
Until tomorrow....

Saturday, September 25, 2010

Resuming the post of a MIC*


Well..

Yesterday I got back from a three-day trip to find out, delightedly, that the husband and the kids did not burn down the house, that they managed to keep it clean and tidy (!surprise, surprise!) and even make a presentable reception and entertainment for Eva's guest.

Nevertheless, I am resuming my motherly duties as of immediately, so I'll just say "Have a nice weekend" and "I'll be writing to you soon".

(Pictures taken during the trip)


Don't worry. I didn't pluck off the peacocks. I collected the feathers from the ground.

Legend:
*MIC= mother in charge

Friday, September 17, 2010

Sea weed necklace

Align Center

Meet my new necklace.

I love the combination of these two colours - they are the perfect match.
The two rows of crocheted flowers are joined together to create my new favourite accessory. Corks took over the part of dangling buttons.

The closure. I love it.

It's got two faces.


The green one is a little contorted due to the joining stitch but I really don't mind.

Thursday, September 16, 2010

Creative space invasion


My creative space is invaded by words in electronic form.
Just a glimpse of what I was working on. The necklace is ready, but has to be photographed.


Thrilled to share another great project in construction - perhaps for the weekend...
And still organic...

Tuesday, September 14, 2010

Fir cone brooch and ring


Continuing the series of organic jewelery, this is what I made with fir cones. A lovely brooch.
I had plenty of fir cones that we gathered last year and which I used to decorate my home.


Working with them was a real challenge because they were pretty tough.
I cut the upper part down to the last layers, smoothed its inner surface. I painted the surface of the one for the brooch, but left the one for the ring plain because I liked its natural appearance.


Must say I am completely equipped with accessories for this fall.
Still there's more coming up!

Saturday, September 11, 2010

Watermelon earrings and a necklace - organic jewelery


The continuation of my series of organic jewelery is with the lovely watermelon earrings and necklace.
The crocheted earrings are quite tiny. While crocheting them I thought my eyes are going to run out! However, it was worth it because I love how they turned out so delicate and sophisticated! It will be a real pleasure to wear these cuties!


Watermelon seeds come in such different hues of brown and black it is really amazing.
For my necklace I had sparkled brownish/beige seeds. I never paint watermelon seeds because nature has taken care of that itself.


This is the necklace with a crocheted detail.


Stay tuned until tomorrow. The series continues!

Wednesday, September 8, 2010

Melon Seed Necklaces - Organic jewelery


I have always been inspired by the lavish, ever-inspiring nature and its incredible power of taking care of its loved ones. In every sense of the word. Whether it regards providing food, clothes or decoration.

I would love to linger on the latter. The primal source of the ancient people to embellish their homes and garments. Back at uni I used to make myself necklaces by using these gifts of nature. So today I returned to the roots again and used the fruits of nature to create a series of organic jewelery. I am going to share my ideas here and the first to be introduced are

The Melon necklaces


Tips for using melon seeds:


If you want to make a necklace or something else, scoop the seeds with a spoon and wash them in warm water with mild washing detergent to take off the slimy fibers. Then, let them sun/air dry. I usually put them onto a cotton napkin so they wouldn't stick to it. It is great if the seeds are big because they are easier for manipulation.

Once dry I love to add a little colour. For my necklaces I used ordinary markers, (in the past I was more patient and used nail polish in different colours). I painted half of the seed because I like the effect they create when stringed together.


When piercing the seeds it is best if you do that in the middle. If you make a hole near the edges the seed might easily split.

After being painted, apply transparent nail polish on the colored parts so that the seeds don't bleed due to body heat/sweat or just simply if you get caught in the rain with them :) 

UPDATE (July 2019) Use acrylic paints instead of markers!!


Choose your favourite colours, string the seeds and make yourself some eye-catching jewelry!


Saturday, September 4, 2010

Inspiration


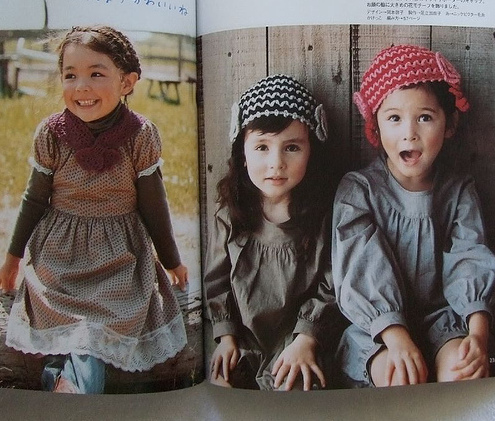
I never get bored by these genuinely inspiring magazines.
Whether it's Cotton friend, Pochee or Pattern book.


Today I bought lace to make myself a dress inspired by these.
I am going to draft the pattern and hopefully have it ready next week.
That is if I manage to get near the sewing machine...

Wednesday, September 1, 2010

Out of the box


No, you are not looking at lollipops.

These are the beads I made for a necklace. Today is their lucky day since they've been in a box for more than a year now (even I can't believe that!) waiting to be finished.


Today I can't concentrate on translating to save my life and I decided to make short interludes during which these babies are going to be polished.


I was thinking that I might actually put a little effort and make the necklace before the turn of the century...

Tuesday, August 31, 2010

How to check the insulation of windings


You are looking at my new blouse.
I had this small piece of jersey just enough for a blouse so I chose a pretty simplistic Burda pattern to make it. I like the big flounce / ruffle at the centre and I believed that with this super soft jersey it's going to fall down as waterfall. But, it didn't prove my expectations.

However, I think it's going to be exploited a lot.


You may wonder what has the title got to do with this post.
It has nothing to do with the post. As of yesterday I am being stuck with translating how to check insulation of windings. It's showing my protest of being held away from my sewing machine.
Tomorrow we start school. So I wanted to make something pretty (do you see how 'pretty' gets to be the most used adjective of the post and with different meanings- mind you!) for myself and actually bought two gorgeous pieces of fabric. But now I can't and that's why I am bitter.

Be well, I am off to tackle some mechanical engineering.

Thursday, August 26, 2010

Fabric flowers tutorial


This is a tutorial I composed and it originated from from the straw flower sticks tutorial (look at the craft tutorial section on the right). I have it in my right side bar but linking to the Burdastyle platform. I thought, why not make it at home and change its address :)
Home archiving is the safest place.

Here it is.
Step 1: Make a fabric tube and fold it in half.


Step 2: Take the second strip and fold it
counterclockwise over the first strip.


Step 3: Hold the upper part firmly with your thumb and forefinger.Then take the first strap and do the same, putting it over the second strap (counterclockwise). Work like this in circles until you get about six 'petals'.


Step 4: When you get the shape of the flower as seen here, you continue by working in circles, sliding the straps underneath the "main part", which you are holding tightly, until you get to the end.


Step 5: This is how it should look viewed from the side.


Step 6: Now thread a needle and secure the 'petals' through all the layers, so that it won't wriggle its way out!


This is the flower you just made. This cutie can be used to make necklaces or rings, headbands, brooches... anything you can think of. I hope you like it.

Wednesday, August 25, 2010

Paper


I am obsessed with paper. Not just any kind. The handmade one.
I love the feeling it conveys - the rough yet fragile surface showing its fiber veins, telling a story of its own... Bearing the stamp of creativity and imagination of the artist who created it.


Yesterday, I bought myself the book called Paper - from the handmade style series by Murdoch Books, and I've already leafed through it numerous times. Filling my eyes with beauty and discovering techniques I would love to try.
The book is a wonderful invitation to explore the creative potential of paper whether recycled or commercial offering elaborate description of gorgeous decorative effects such as embossing, embedding and laminating.

While in Italy we visited a Paper farm and participated in creation of the fibers for paper. With this book, my experience made a full circle. With eagerness I hope to plunge into a paper making project. Soon...